- View products

Windows OS (2nd Gen)
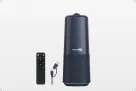
NearHub Board Max

Windows OS
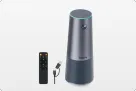
NearHub Board S Pro

For Huddle Rooms
NearHub Board S55

For Medium Rooms
NearHub Board S65

For Large Rooms
NearHub Board S75

For Broad Rooms
NearHub Board S86

Smart Digital Photo Frame with Air Quality Monitor
NearHub Frames 10

USB Drawing Tablet
NearHub MagicPad ST1160

Real-time Online Whiteboard
NearHub Canvas

Digital Signage and Batch Management
NearRooms
- View products

True 4K 360° All-in-1 Camera for Hybrid Meetings
Nearity 360 Alien

True 4K 120° All-in-1 Camera for Team Collaboration
Nearity 120 Max

Professional Audio&Pioneering Daisy-Chain
Nearity A20S

4K UHD 120° Webcam for Hybrid Meeting
Nearity V30S
360° All-in-one Camera for Pro Group Chat
Nearity 360 Basic
All-in-one Camera for Group Meeting
Nearity C45
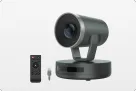
Powerful PTZ Camera with 10x Hybrid Zoom
Nearity V410

Firmware Updater and Device Controller
NearSync
- View products
- Meeting Room
- Meeting Scenario
- Whiteboard


Recording a Zoom meeting on your laptop is a skill that becomes essential the moment you need to preserve an important conversation. Whether you are an educator capturing lectures, a business professional documenting client calls, or a team lead saving training materials, knowing how to record a Zoom meeting on a laptop ensures nothing important slips through the cracks.
In this guide, you will learn how to record a meeting on Zoom using both Windows and Mac laptops, understand local versus cloud recording, troubleshoot common issues like missing recording buttons, and apply best practices for useful recordings. All instructions reflect the Zoom Workplace app as of 2026.
What You Need Before You Start Recording
Before diving into the steps, make sure your setup meets a few basic requirements:
Zoom Workplace desktop app. Local recording is only available through the desktop client for Windows, macOS, or Linux. Browser-based and mobile versions do not support saving recordings directly to your device. Download the latest version from zoom.us/download. As of 2026, the app requires Windows 10 or later, or macOS 11 and above.
Host or co-host status. By default, only the meeting host and any assigned co-hosts can initiate recording. Participants cannot record unless the host explicitly grants permission.
Storage space. A one-hour recording typically consumes 300 MB to 1 GB, depending on video quality and the number of participants with cameras enabled. Ensure your laptop has at least 2 GB of free space before starting a long session.
Recording enabled in settings. If you are the host, confirm recording is turned on at zoom.us/profile/setting in the Recording tab. If you are new to hosting, our guide on how to schedule a Zoom meeting walks you through the setup.

How to Record Zoom Meeting on Windows
Learning how to record a Zoom meeting on Windows follows a straightforward process once you are in the meeting.
Step 1: Start or Join Your Meeting
Open the Zoom Workplace desktop app on your Windows laptop, sign in, and start or join a meeting. Only the host or a co-host can record by default.
Step 2: Locate the Record Button
Once inside the meeting, look at the bottom toolbar. If you see a Record button, click it. If not, click the More icon (three dots) to reveal the Record option.
Step 3: Choose Your Recording Location
After clicking Record, you will see two options for paid accounts:
- Record on this Computer — saves the file locally to your laptop
- Record to the Cloud — uploads the recording to Zoom's servers
Free plan users will only see the local recording option, which is sufficient for most use cases.
Step 4: Confirm Recording Is Active
A red "Recording" indicator appears in the top-left corner. All participants see this indicator along with an audio notification. This transparency is a built-in Zoom privacy feature that cannot be disabled.
Step 5: Pause or Stop the Recording
Click the Record button again to reveal Pause Recording or Stop Recording. Pausing keeps everything in a single file when resumed; stopping ends the current file. If you stop and record again, Zoom creates a separate file.
Step 6: End the Meeting and Let Zoom Convert
When you end the meeting, Zoom automatically converts the raw recording into an MP4 file. Do not shut down your laptop or close Zoom until the conversion completes — interrupting the process can corrupt the recording.
Step 7: Access Your Recording
Once the conversion finishes, Zoom opens the folder with your files. By default, Windows saves recordings to:
C:\Users\[YourUsername]\Documents\Zoom\[MeetingName_Date]Each folder contains an MP4 video file, an M4A audio-only file, and a VTT chat transcript if chat was active.
How to Record Zoom Meeting on Mac
How to record zoom meeting on Mac is nearly identical to Windows, with a few macOS-specific differences.
Step 1 Through 5: Same as Windows
The Zoom interface is consistent across platforms — follow Steps 1 through 5 above.
Step 6: Allow Conversion to Complete
Keep Zoom open and your Mac awake until the conversion finishes. Putting your Mac to sleep or quitting prematurely may result in a lost recording.
Step 7: Find Your Mac Recording
Mac saves local recordings to /Users/[YourUsername]/Documents/Zoom/[MeetingName_Date]. Access recordings through the Zoom desktop app by clicking Meetings > Recorded > Open. To change the save location, go to Zoom Settings > Recording > Local Recording > Change.
Zoom Cloud Recording vs Local Recording: Which Should You Choose?
Understanding the difference between cloud and local recording helps you pick the right option.

| Feature | Local Recording | Zoom Cloud Recording |
|---|---|---|
| Plan requirement | Free and paid plans | Pro, Business, Enterprise |
| Storage location | Your laptop hard drive | Zoom cloud servers |
| Processing time | Immediately after conversion | 2x recording duration (up to 24 hrs) |
| Automatic transcription | No | Yes, for English |
| Shareable link | Must upload manually | Generated automatically |
| Mobile recording | Not available | Available on paid plans |
| Storage limit | Unlimited (your disk space) | Plan-dependent (5 GB on Pro) |
Choose local recording when you need immediate file access, are on a free plan, want unlimited storage, or have privacy concerns. Educators and businesses handling sensitive conversations often prefer local recording.
Choose cloud recording when you need automatic transcription, shareable links, or access from multiple devices. University administrators and distributed teams often find cloud recording more convenient.
Zoom Recording Permissions: Who Can Record and How to Grant Access
Zoom recording permissions are designed to protect participant privacy. Here is exactly how they work.
Default permissions. Only the meeting host and any co-hosts can start a recording. Participants see a greyed-out Record button unless the host grants them permission.
Granting recording permission as a host:
- During the meeting, click Participants in the toolbar
- Hover over the participant's name
- Click More (three dots) next to their name
- Select Allow Record
The participant will see a notification that they now have recording privileges. This permission only lasts for the current meeting.
If you are a participant who needs to record, the simplest approach is to ask the host. If that is not possible, use your laptop's built-in screen recorder:
- Windows: Press Win + G to open Xbox Game Bar, then click Record (or Win + Alt + R). Captures system audio by default.
- Mac: Press Cmd + Shift + 5, select the Zoom window, and click Record. QuickTime does not capture system audio natively without a third-party driver like BlackHole.
Important: Always inform other participants that you are recording. Recording consent laws vary by state and country, and many jurisdictions require all-party consent.
Where to Find Your Zoom Recordings After the Meeting
Locating your recordings quickly matters when others are waiting for the file.
For local recordings, the default paths are:
- Windows:
C:\Users\[Username]\Documents\Zoom - Mac:
/Users/[Username]/Documents/Zoom
Each meeting gets its own folder named with the meeting title and date. Inside you will find the MP4 video file.
For cloud recordings, sign in at zoom.us/signin, navigate to Recordings, and click Cloud Recordings. From here you can play, download, share via link, or trim the playback range.

Tip for educators and teams: Create a dedicated folder for organizing recordings by course or project. Rename files immediately after conversion with descriptive names like Biology101_Lecture_May29.mp4 rather than relying on Zoom's default naming.
Troubleshooting Common Zoom Recording Issues
Even with the right setup, recording problems happen. Here is how to fix the most common ones.

"Why can't I record a Zoom meeting?" — The Record button is missing or greyed out
If you cannot click Record:
- Confirm you are signed into the same Zoom account that scheduled the meeting
- Check that you are listed as the host or co-host in the Participants panel
- Ask the host to grant you recording permission via Participants > More > Allow Record
- Verify recording is enabled at zoom.us/profile/setting > Recording
- Update your Zoom Workplace app to the latest version
Recording has no audio
Check Zoom Settings > Audio and ensure the correct microphone and speaker are selected. For Mac screen recording, remember QuickTime does not capture system audio without additional software.
Zoom is stuck converting the recording
- Wait at least 10 minutes for long recordings
- Check that your laptop has sufficient free disk space and stays awake
- Try manual conversion through the Zoom desktop app: Meetings > Recorded > Convert
Cannot find the cloud recording
- Check the Processing status in your Zoom web portal
- Confirm your account has cloud recording enabled (requires Pro plan or higher)
- Verify you have not exceeded your cloud storage limit
- Allow up to 24 hours for processing before contacting Zoom Support
For more tips on improving video and audio quality, see our guide on how to improve Zoom video quality.
Best Practices for Professional Recording Quality
Getting the recording to work is only half the battle. Making it look and sound professional is what separates useful recordings from unusable ones.
Start recording before screen sharing. If your presentation involves slides or demos, begin recording before you share your screen. Screen shares initiated before recording starts are sometimes not captured properly.
Optimize your background. A clean, distraction-free background helps viewers focus on your content. If your environment is not ideal, learn how to change background on Zoom to present a more professional appearance.
Use a stable internet connection. Wired Ethernet produces more reliable recordings than Wi-Fi. If you must use Wi-Fi, position yourself close to the router and close bandwidth-heavy applications.
Mute participants when they are not speaking. Background noise is more distracting in recordings than in live meetings. Ask participants to mute themselves or use Zoom's mute-all feature for large sessions.
Test your audio levels beforehand. If you frequently record meetings or lectures, take time to learn how to change volume in Zoom Workplace meetings to ensure balanced audio.
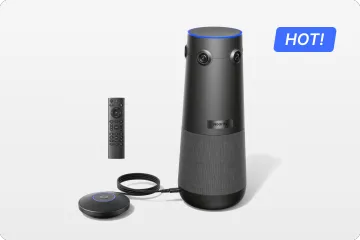
For organizations running hybrid classrooms or conference rooms, combining laptop recording with dedicated hardware can dramatically improve quality. The NearHub S Max Interactive Smart Whiteboard is an all-in-one Windows 11 collaboration display with a 130-degree ultra-wide 4K camera and AI Gallery View, purpose-built for immersive hybrid meetings. Its native Zoom compatibility lets you start and manage recordings directly from the board while capturing the entire room in professional quality.

Frequently Asked Questions
Why can't I record a Zoom meeting?
The most common reason is that you are a participant without host permission to record. Only hosts and co-hosts can record by default. Other causes include using an outdated Zoom app, having recording disabled in your account settings, insufficient storage space, or joining from a mobile device on a free plan. Ask your host to grant recording permission, or update your Zoom Workplace app to the latest version.
Where are Zoom recordings saved on my laptop?
Local recordings are saved to your Documents folder by default: on Windows, check C:\Users\[YourName]\Documents\Zoom; on Mac, check /Users/[YourName]/Documents/Zoom. Cloud recordings are accessed through the Zoom web portal at zoom.us/signin under the Recordings section. You can change the default save location in Zoom Settings > Recording.
Can I record a Zoom meeting as a participant?
By default, only hosts and co-hosts can record. As a participant, you need the host to grant you recording permission during the meeting by clicking Participants > More next to your name > Allow Record. Alternatively, you can use your laptop's built-in screen recorder (Xbox Game Bar on Windows, QuickTime on Mac) to capture the meeting independently, though you should always inform other participants before recording.
How long does Zoom take to process a cloud recording?
Cloud recordings typically take about twice the recorded duration to process. For example, a 30-minute recording usually processes within 30 to 60 minutes. Occasionally, high server loads may extend processing up to 24 hours. You will receive an email notification once your recording is ready. If processing exceeds 48 hours, contact Zoom Support.
What is the difference between local and cloud recording on Zoom?
Local recording saves MP4 files directly to your laptop's hard drive and is available on all plans including free. Cloud recording stores files on Zoom's servers, requires a Pro, Business, or Enterprise plan, and includes automatic transcription, shareable links, and access from any device. Local recording offers immediate access and unlimited storage; cloud recording offers convenience and collaboration features.
Conclusion
Knowing how to record a Zoom meeting on laptop is an essential skill for educators, business professionals, and anyone who needs to preserve virtual conversations. The process itself is simple — open Zoom, click Record, choose your destination, and let the app handle the conversion. What makes recordings truly valuable is understanding the nuances: choosing between local and cloud storage, managing permissions correctly, troubleshooting when things go wrong, and applying quality best practices that make your recordings easy to watch and share.
Start by enabling recording in your Zoom settings, test with a short practice meeting, and establish a consistent file organization system. Whether you are documenting lectures, saving client calls, or building training materials, a reliable recording workflow pays dividends. Take a moment now to run a quick 30-second test recording — that step ensures you are ready when it matters.