How to Schedule a Zoom Meeting (Step-by-Step Guide for Beginners)
Learn how to schedule a Zoom meeting with this beginner-friendly guide, which covers meeting setup, recurring meetings, security settings, calendar integrations, and invitation tips.
schedule zoom meeting
Updated: Aug 19, 2026 · 7 minutes read
Global Business, Brought Near.
No Installer, No Hassle, Just Works.
If you are managing remote teams, running online classes, or coordinating with clients, knowing how to schedule a Zoom meeting efficiently is one of the most valuable skills you can have. Zoom remains the go-to video conferencing platform for millions of professionals and educators worldwide, and scheduling meetings properly ensures that everyone joins on time with the right settings.
In this guide, you will learn exactly how to schedule a Zoom meeting from start to finish — whether you are using the Zoom web portal, desktop app, or mobile device. We will walk through every setting, from basic meeting details to advanced security configurations, recurring meetings, and calendar integrations. By the end, you will know how to schedule a Zoom meeting with confidence and avoid the common mistakes that derail online sessions.
What You Need Before Scheduling a Zoom Meeting
Before you zoom schedule a meeting, make sure you have the following ready:
A Zoom account — You can schedule meetings with a free Basic account. Paid plans (Pro, Business, Enterprise) unlock longer group meetings, cloud recording, and advanced admin controls.
A web browser or the Zoom desktop app — The desktop app (available for Windows, macOS, Linux, iOS, and Android) offers the most complete scheduling experience. The web portal at zoom.us works equally well on any browser.
A stable internet connection — A minimum of 1.5 Mbps is recommended for smooth video calls.
Optional calendar integration — Connecting Zoom to Google Calendar or Microsoft Outlook streamlines the scheduling workflow and automatically adds join links to calendar invites.
How to Schedule a Zoom Meeting
Follow these steps to schedule Zoom meeting sessions that run smoothly every time.
Sign In to Your Zoom Account
Open the Zoom desktop app or navigate to zoom.us in your browser. Click Sign In and enter your credentials. If your organization uses SSO (Single Sign-On), select the SSO option and authenticate through your company portal.
Click "Schedule a Meeting"
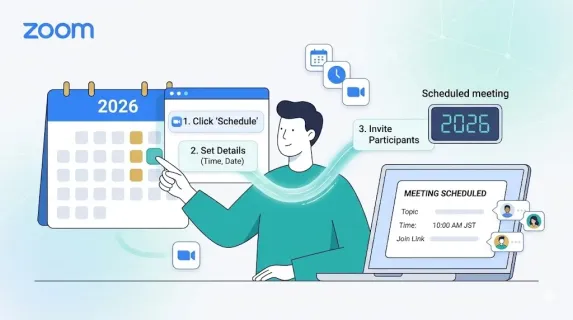
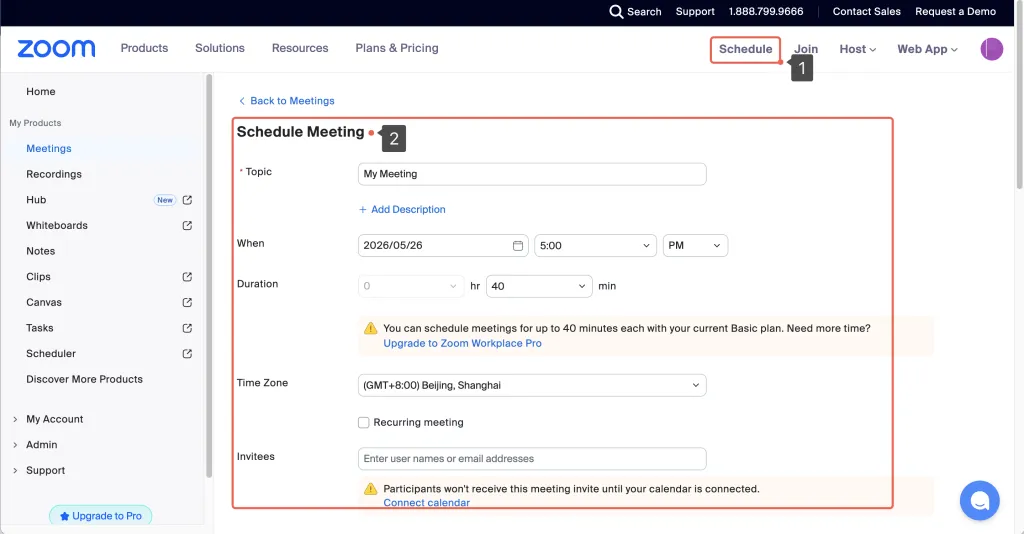
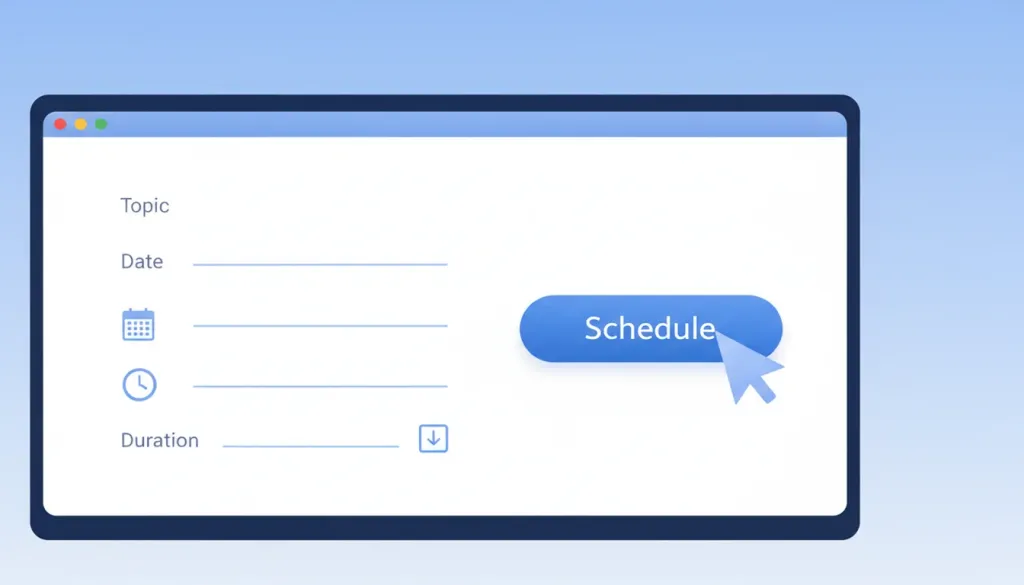
Once signed in, locate the Schedule button — it appears prominently on the home screen of the desktop app and in the top navigation menu of the web portal. Clicking this opens the meeting configuration form, where you will define all settings for your session.
Enter Your Meeting Details
Fill out the meeting information form with the following fields:
Topic — Use a clear, descriptive name such as "Weekly Sales Standup" or "Q3 Budget Review." A specific topic helps participants identify the meeting quickly in their calendars.
Description (optional) — Add context, meeting goals, or a brief agenda. This field appears in calendar invites and gives attendees a preview of what to expect.
Date and time — Select when the meeting starts. Zoom automatically detects your local time zone, but you can override this if scheduling for a different region.
Duration — Estimate how long the meeting will run. This is for scheduling reference only — the meeting will not automatically end when the time expires.
Time zone — Confirm the time zone is correct, especially when participants are distributed across regions.
Choose a Meeting ID
Zoom gives you two options for the meeting ID:
Generated meeting ID — Zoom creates a unique ID for this meeting only. This is the more secure option and is recommended for most business and educational use cases.
Personal Meeting ID (PMI) — A permanent ID assigned to your account. The PMI never changes, which makes it convenient for recurring personal meetings or office hours. However, because the link stays the same, anyone with the link can attempt to join at any time.
Best practice: Use a generated meeting ID for client calls, team meetings, and any session where security matters. Use your PMI only for internal, recurring check-ins with trusted participants.
Set Up a Recurring Zoom Meeting
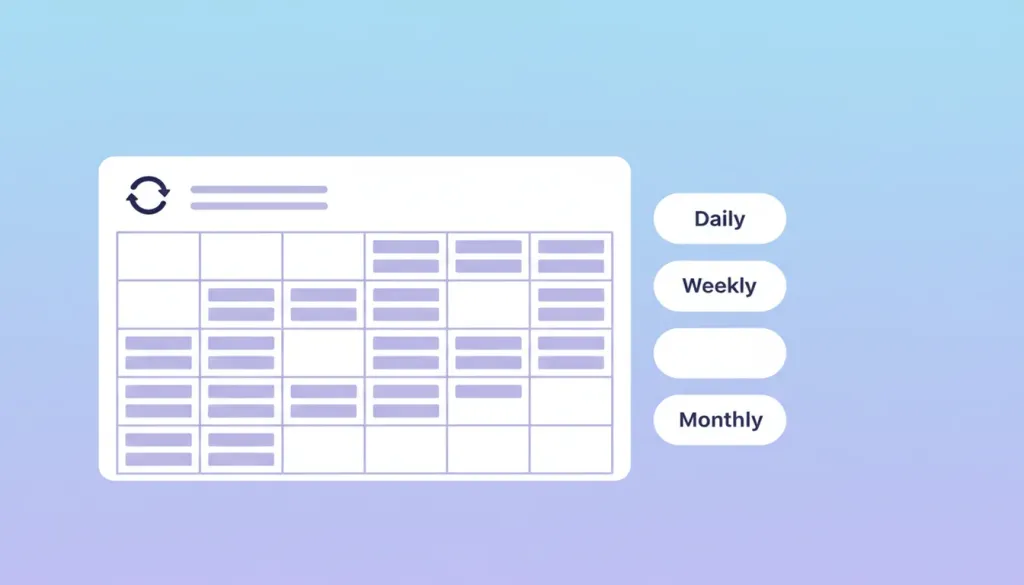
If this meeting repeats on a regular schedule — such as daily standups, weekly team syncs, or monthly board meetings — enable the Recurring meeting option. When you check this box, Zoom reveals additional controls:
Recurrence — Choose daily, weekly, or monthly.
Repeat every — Set the interval (for example, every 1 week or every 2 weeks).
End date — Define when the series ends, either by a specific date or after a set number of occurrences.
Once configured, save the meeting. Zoom will generate a single join link that works for every instance in the series, making it easy to share once and reuse indefinitely.
Configure Security Settings
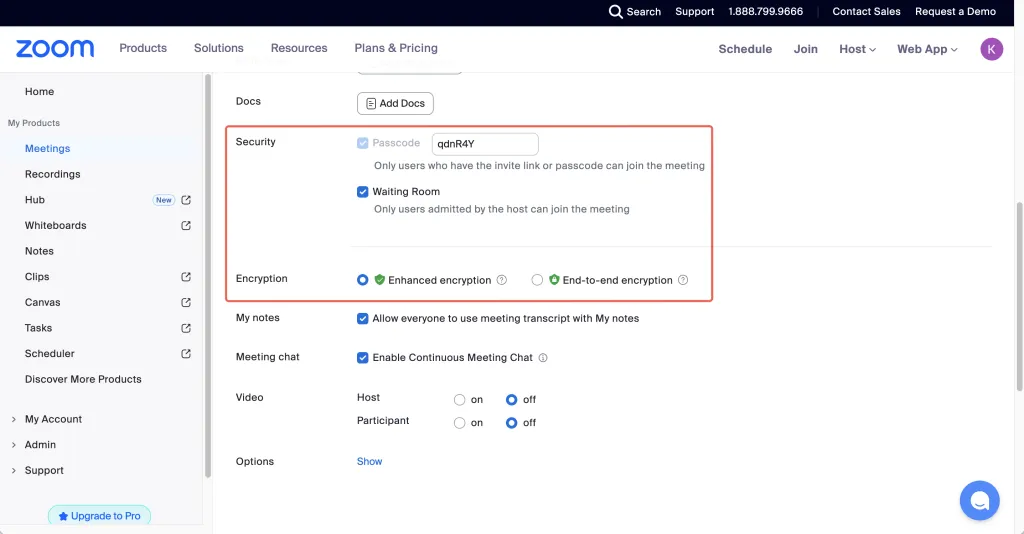
Security is critical for any online meeting. Zoom provides several built-in protections:
Passcode — Require participants to enter a passcode before joining. Zoom auto-generates a passcode, but you can customize it. Include the passcode in your invitation or share it separately.
Waiting Room — When enabled, participants enter a virtual lobby and must be admitted by the host. This gives you full control over who enters the meeting and when.
Only authenticated users can join — Restrict attendance to users signed into Zoom or users from specific email domains. This is especially useful for internal company meetings.
For sensitive meetings, enable both the Waiting Room and a passcode. This two-layer approach prevents uninvited guests from disrupting your session.
Adjust Video and Audio Settings
Configure how participants appear and communicate when they join:
Host video — Set whether your camera is on or off when you join. Most hosts prefer video on to establish presence.
Participant video — Choose whether attendees join with cameras on or off. For large webinars, off by default reduces bandwidth load.
Audio options — Allow both computer audio and telephone dial-in, or restrict to one method. Enabling both gives participants maximum flexibility.
Manage Participant Permissions
Scroll to the Meeting Options section to fine-tune participant behavior:
Join before host — Allow participants to enter the meeting room before you arrive. You can set a time window (5, 10, or 15 minutes early).
Mute participants upon entry — Automatically mutes everyone when they join. This is ideal for large meetings or training sessions where you want to control when people speak.
Automatically record meeting — Start a local or cloud recording as soon as the meeting begins. Useful for compliance, training archives, or sharing sessions with absent colleagues.
Breakout room pre-assign — If you plan to use breakout rooms, you can create groups in advance.
Save the Meeting
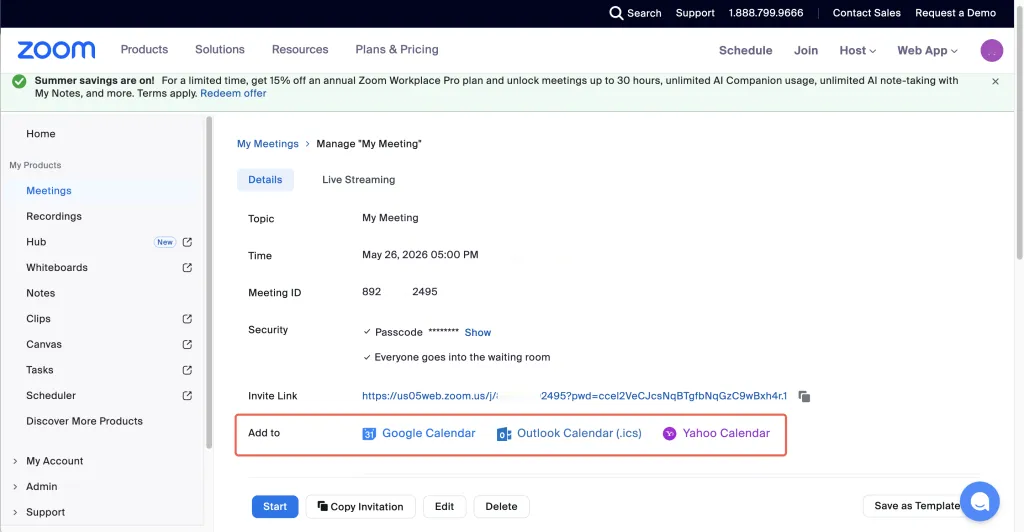
After reviewing all settings, click Save. Zoom generates a meeting summary page containing your Meeting ID, join link, passcode, and dial-in numbers. This is the information you will share with participants.
How to Send Zoom Meeting Invitations(Google Calendar & Outlook)
Once your meeting is scheduled, the next step is getting participants into the room. Whether you are coordinating with a small team or a large group, knowing how to invite people to a Zoom meeting efficiently ensures everyone receives the correct information. Here is how to send Zoom meeting invitations effectively.
Copy the Zoom Invitation Link
From the meeting summary page, click Copy Invitation. This copies the entire meeting details — including the join link, Meeting ID, passcode, and dial-in numbers — to your clipboard. Paste this into an email, chat message, or event description.
If you want to share just the link, click Copy Join Link and distribute it through any channel your team uses.
For a deeper walkthrough on invitation methods, check out this guide on how to send a Zoom invite with additional tips for different platforms.
Add Zoom Meetings to Google Calendar
Integrating Zoom with Google Calendar saves time and prevents scheduling conflicts. Install the Zoom for Google Workspace add-on from the Google Workspace Marketplace. Once connected, every scheduled Zoom meeting automatically appears in your Google Calendar with the join link embedded.
When creating a calendar event, simply click Make it a Zoom Meeting and the details populate instantly. If you are unsure how to add a Zoom link to Google Calendar manually, you can paste the join link directly into the event description field as a fallback. For full step-by-step instructions, refer to this guide on how to add Zoom to Google Calendar.
Schedule Zoom Meetings in Outlook
For Microsoft 365 users, the Zoom Outlook add-in places a Add Zoom Meeting button directly inside your calendar and email compose windows. Install the add-in, sign in to your Zoom account, and click the button to insert meeting details into any Outlook event.
Best Zoom Meeting Settings for Teams and Businesses
Optimizing your meeting settings improves the experience for everyone. Here are the best practices:
Waiting Room best practices — Enable the Waiting Room for external meetings, client calls, and public webinars. Admit participants individually or in bulk once you are ready to begin.
Password recommendations — Use Zoom's auto-generated passcodes rather than simple custom passwords. The default passcodes are random, secure, and automatically embedded into join links so participants rarely need to type them manually.
Auto-recording — Enable automatic recording for training sessions, compliance reviews, and important decision-making meetings. Store recordings in the cloud for easy sharing or locally for privacy.
Hybrid meeting tips — If your team includes both in-room and remote participants, position cameras to capture the full room, use dedicated microphones for clear audio, and share content through a central display so everyone sees the same material.
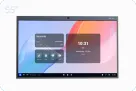
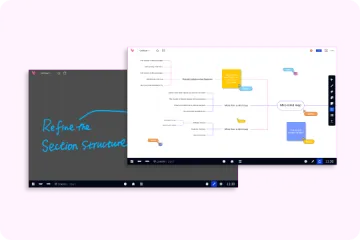
Conference room collaboration improvements — For organizations that frequently host hybrid meetings, upgrading to an interactive display like the NearHub Board Max transforms the conference room into a true collaboration hub. The 4K touchscreen enables in-room participants to annotate, share content wirelessly, and engage with remote attendees on equal footing. Unlike standard displays, an interactive whiteboard ensures remote participants can see and contribute to whiteboard sessions in real time — eliminating the common problem of in-room content being invisible to virtual attendees.
Common Zoom Scheduling Problems and How to Fix Them
Even with careful setup, issues can arise. Here is how to resolve the most common problems.
Zoom Meeting Not Showing in Calendar
If your scheduled meeting does not appear in Google Calendar or Outlook, verify that the calendar integration is active. In Zoom settings, go to Meetings > Calendar and Contact Integration and confirm your calendar account is connected. For manual entries, paste the meeting link directly into the calendar event description.
Participants Cannot Join the Meeting
This usually stems from one of three causes:
Incorrect passcode — Double-check that the passcode in your invitation matches the meeting settings. If participants are getting a "Wrong passcode" error, regenerate the invitation and resend.
Waiting Room enabled — You may need to admit participants from the Waiting Room. Open the Participants panel and click Admit next to each name.
Meeting has not started — If Join Before Host is disabled, participants cannot enter until you join. Enable this setting if you want people to connect early.
Incorrect Time Zone Settings
Time zone mismatches cause participants to join at the wrong hour. In your Zoom profile settings, confirm your Time Zone under the Profile tab. When scheduling, always verify the displayed time zone next to the date and time fields. For international meetings, include the time zone in your invitation (for example, "10:00 AM EST / 4:00 PM CET").
Recurring Meetings Not Updating Properly
If you edit a recurring meeting and changes do not apply, ensure you are editing the entire series rather than a single occurrence. In the Zoom web portal, select Edit All Occurrences when making changes to the meeting pattern. If you edit only one instance, Zoom treats it as an exception and future sessions may revert to the original settings.
Zoom Scheduling Tips for Better Online Meetings
Small habits make a significant difference in meeting quality:
Name meetings clearly — Replace vague titles like "Meeting" with descriptive names such as "Marketing Q3 Campaign Review — July 15." Clear names help attendees prioritize and find events in their calendars.
Add agendas in the description — A two- or three-bullet agenda in the meeting description keeps conversations focused and respects everyone's time.
Avoid scheduling conflicts — Use the calendar integration to check availability before sending invites. For teams across time zones, tools like World Time Buddy help identify overlapping work hours.
Send invitations early — Distribute invites at least 24 hours before the meeting. For external stakeholders, 48 to 72 hours in advance is ideal. Early invitations increase attendance and give participants time to prepare.
Include backup dial-in numbers — Not everyone has reliable internet. Including the telephone dial-in option ensures participants can still join by phone if their connection fails.
FAQs
Can I schedule a Zoom meeting for free?
Yes. Free Zoom accounts can schedule unlimited one-on-one meetings and group meetings up to 40 minutes. To schedule longer group meetings or access advanced features like cloud recording, you will need a paid plan such as Zoom Pro.
How do I create a recurring Zoom meeting?
When scheduling a meeting, check the Recurring meeting box in the Date and Time section. Choose your recurrence pattern — daily, weekly, or monthly — and set an end date or number of occurrences. Save the meeting and all future sessions will use the same meeting ID and join link.
Can participants join before the host?
Yes, but only if you enable this option in the meeting settings. Under Meeting Options, check Allow participants to join before host. You can also specify how early they can join — 5, 10, or 15 minutes before the scheduled start time.
How do I add Zoom meetings to Google Calendar?
Install the Zoom for Google Workspace add-on from the Google Workspace Marketplace. When scheduling a Zoom meeting, click Add to Google Calendar. The meeting details, including the join link, will automatically appear in your Google Calendar event. You can also follow a detailed guide to add Zoom to Google Calendar for step-by-step instructions.
What is the difference between a Personal Meeting ID and a generated meeting ID?
A Personal Meeting ID (PMI) is a permanent, fixed meeting ID tied to your account. It is useful for recurring personal meetings because the link never changes. A generated meeting ID is unique and created for each individual meeting, offering better security and privacy since the ID changes every time.
Conclusion
Learning how to schedule a Zoom meeting is straightforward once you understand the full range of settings available. By following the steps in this guide — from entering meeting details and choosing the right Meeting ID to configuring security, enabling recurring sessions, and integrating your calendar — you can set up professional, reliable meetings every time.
The key is preparation. A well-configured meeting with clear invitations, proper security settings, and calendar integration eliminates friction for both hosts and participants. For teams that rely on hybrid work, taking the extra step to optimize your physical meeting space with collaborative tools like the NearHub Board Max ensures that remote and in-person attendees remain equally engaged.
Start applying these steps today, and for additional strategies on improving meeting quality, engagement, and communication, explore these video conferencing tips to help every meeting run more effectively.