- View products

Windows OS (2nd Gen)
NearHub Board Max

Windows OS
NearHub Board S Pro

For Huddle Rooms
NearHub Board S55

For Medium Rooms
NearHub Board S65

For Large Rooms
NearHub Board S75

For Broad Rooms
NearHub Board S86

Smart Digital Photo Frame with Air Quality Monitor
NearHub Frames 10

USB Drawing Tablet
NearHub MagicPad ST1160

Real-time Online Whiteboard
NearHub Canvas

Digital Signage and Batch Management
NearRooms
- View products

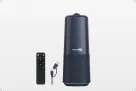
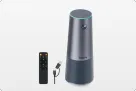
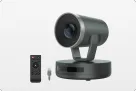
True 4K 360° All-in-1 Camera for Hybrid Meetings
Nearity 360 Alien

True 4K 120° All-in-1 Camera for Team Collaboration
Nearity 120 Max

Professional Audio&Pioneering Daisy-Chain
Nearity A20S
4K UHD 120° Webcam for Hybrid Meeting
Nearity V30S
360° All-in-one Camera for Pro Group Chat
Nearity 360 Basic
All-in-one Camera for Group Meeting
Nearity C45
Powerful PTZ Camera with 10x Hybrid Zoom
Nearity V410

Firmware Updater and Device Controller
NearSync
- View products
- Meeting Room
- Meeting Scenario
- Whiteboard


This comprehensive guide explains how to quickly set up the Nearity 360 Alien by NearHub for any hybrid workspace. It covers two primary connection methods: a reliable plug-and-play USB connection and a clutter-free wireless setup using a dedicated dongle. By following these easy steps for hardware installation and software configuration, you can transform your meeting space with one of the industry's premier conference room solutions.
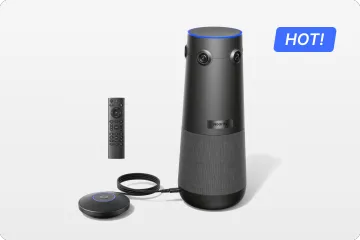
Upgrading your workspace with the best video conference camera? You’ve made a great choice! The Nearity 360 Alien by NearHub is designed to make hybrid meetings seamless, clear, and truly immersive.
Whether you prefer a traditional wired connection or a clean, cable-free setup, getting started is an absolute breeze. Here is your simple, step-by-step guide to setting up your Nearity 360 Alien for your next big meeting.
What’s in the Box?
Before we dive in, let’s make sure you have everything you need. In your package, you will find:
The Nearity 360 Alien camera
1x Remote Control
1x Expansion Microphone
1x Power cable
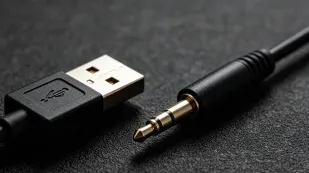
1x USB Type-C / Type-A cable
User Manual
Warranty Card
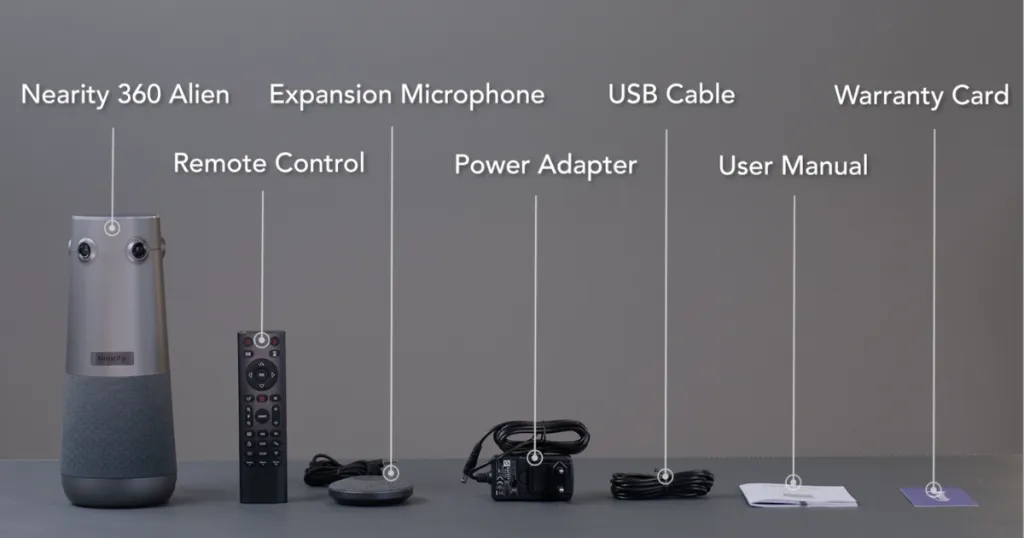
Note: If you plan to use the wireless method, the Wireless Dongle is sold separately.
Option 1: Setup via USB Cable
If you prefer a classic plug-and-play wired connection, follow these simple steps:
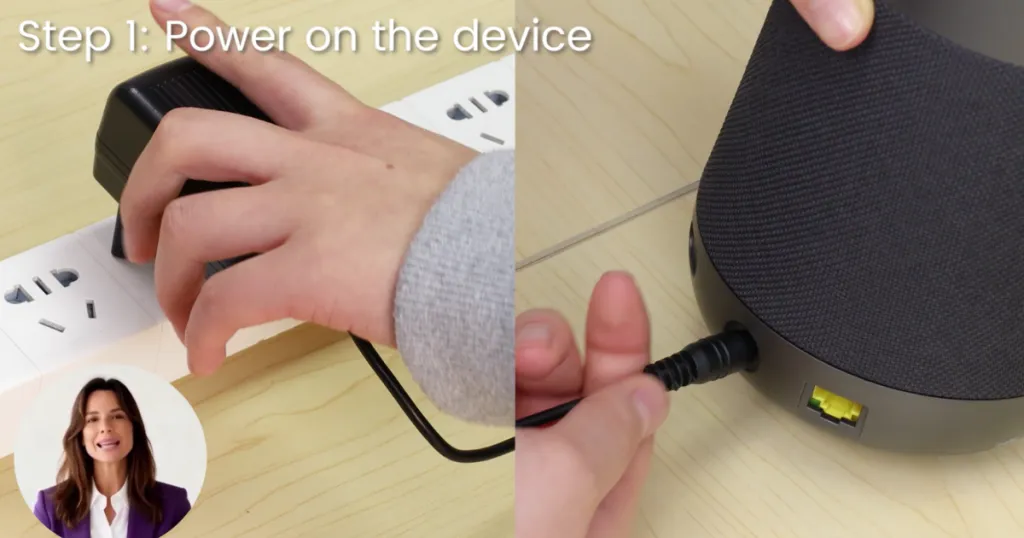
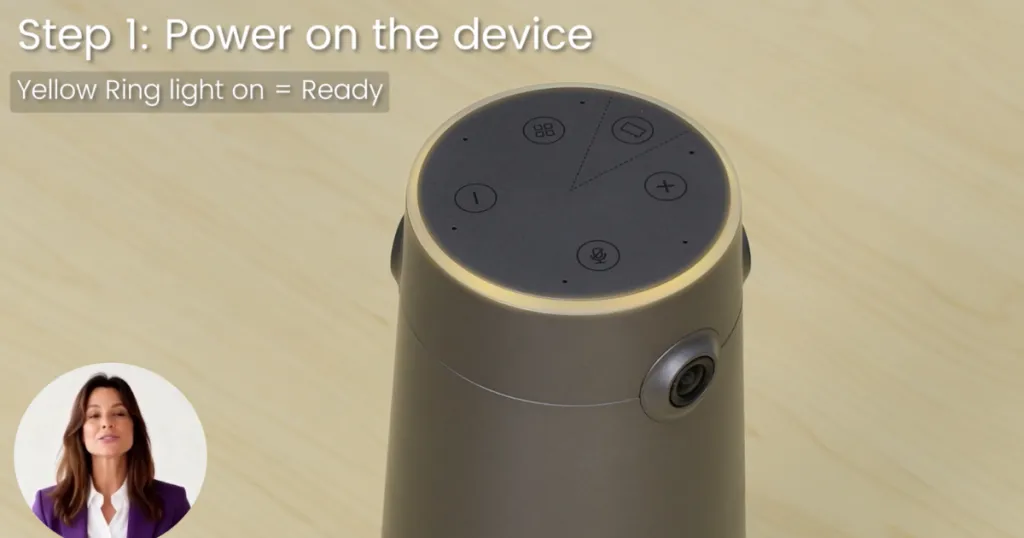
Step 1: Power it up
Connect the power cable to the back of your Nearity 360 Alien, then plug it into a nearby power outlet. Once the yellow ring light turns on, your device is powered up and ready!
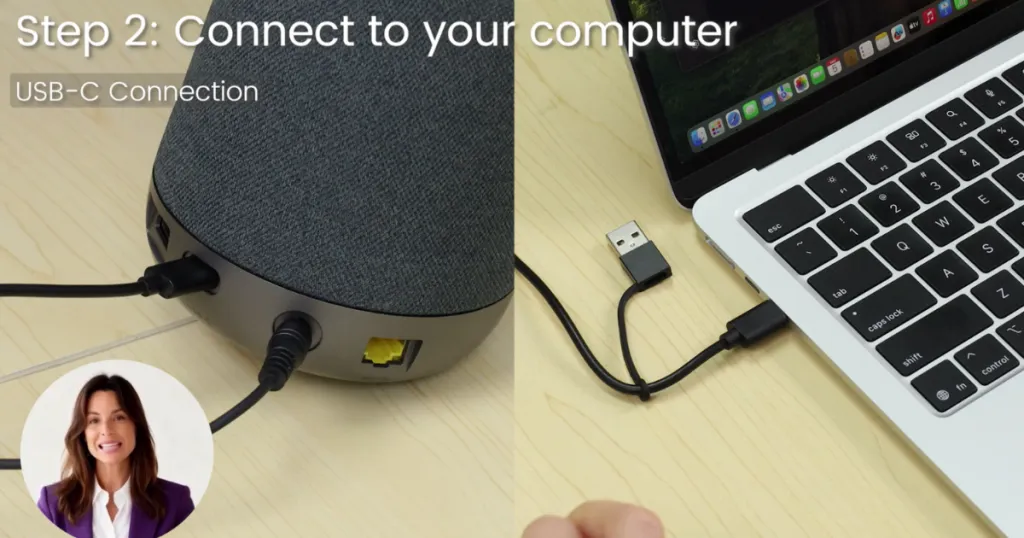
Step 2: Connect to your computer
Take the included USB Type-C or Type-A cable. Plug one end into the camera and the other end directly into your computer's USB port. When the green ring light turns on, your device is connected.

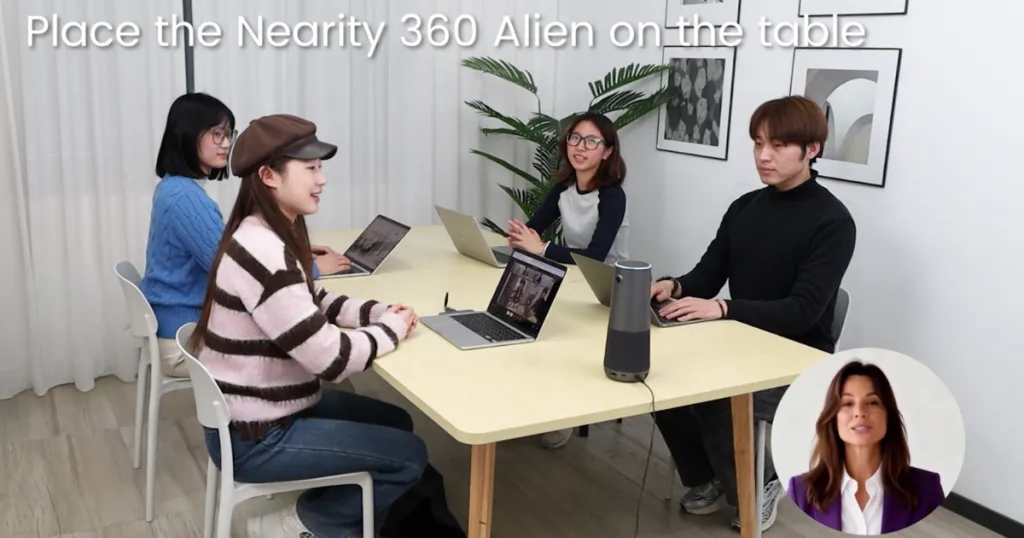
Step 3: Position the camera
Place the Nearity 360 Alien on your conference table—either at the center or along one side. Its 360-degree design ensures everyone around the table can be seen and heard clearly.
Option 2: Setup via Wireless Dongle
Want to keep your conference table completely free of clutter? The wireless setup is the way to go:
Step 1: Power it up
Just like the wired method, connect the power cable to the camera and plug it into a power source. Wait for that yellow ring light to turn on to confirm it has power.
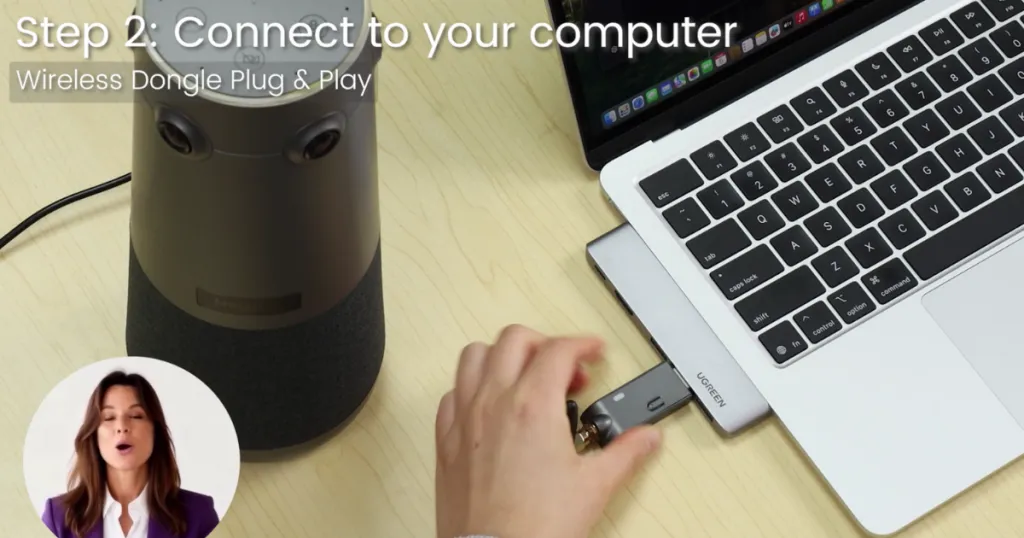
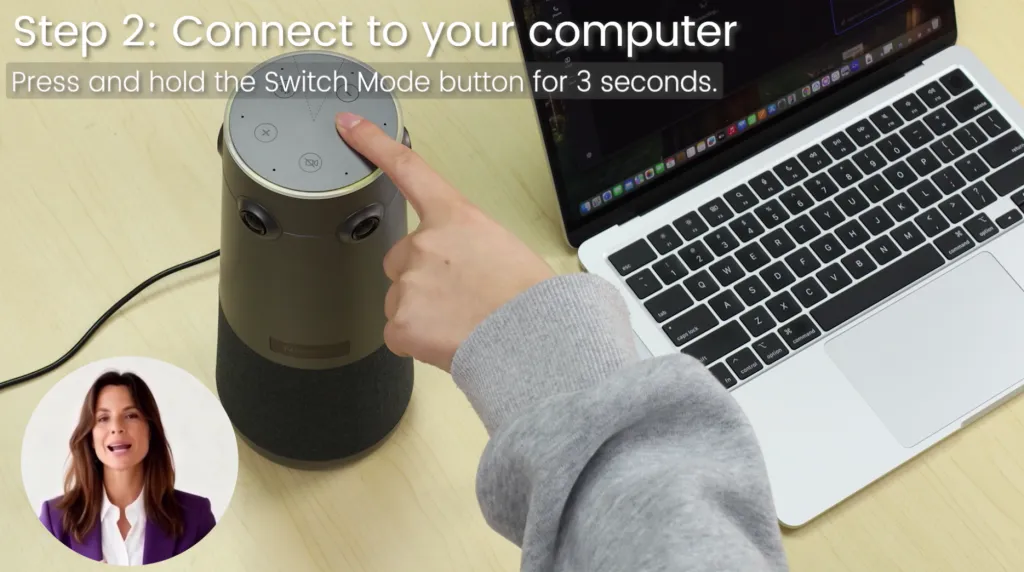
Step 2: Connect the dongle to your computer
Grab your wireless dongle (sold separately) and simply plug it into an available USB port on your computer.
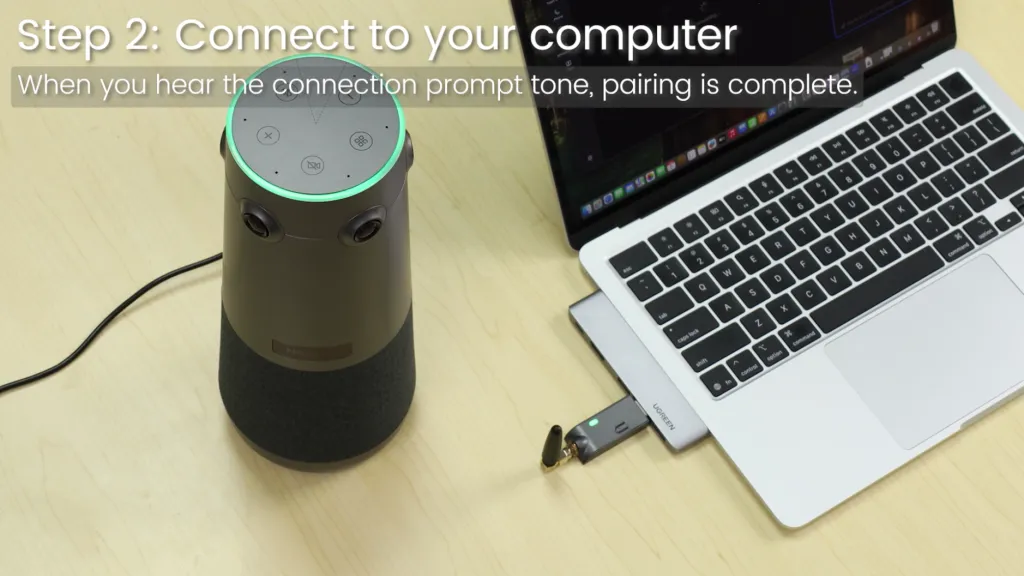
For the first-time connection, pairing is required. Press and hold the Switch Mode button for 3 seconds to connect your Nearity 360 Alien. During the pairing process, the dongle’s white indicator light will flash continuously, and the device will announce “pairing.” When you hear the “connected” prompt, pairing is complete—the green ring light on the device will turn on, and the dongle will show a solid white light.
After the initial setup, the device will connect automatically in future use—no need to repeat the pairing process.
Step 3: Position the camera
Place the Nearity 360 Alien on your conference table—either at the center or along one side. Its 360-degree design ensures everyone around the table can be seen and heard clearly.
Final Step: Configure Your Meeting Software
No matter which connection method you chose, the final software setup is exactly the same.
Launch your meeting app: Open your preferred platform, whether that’s Zoom, Google Meet, or Microsoft Teams.
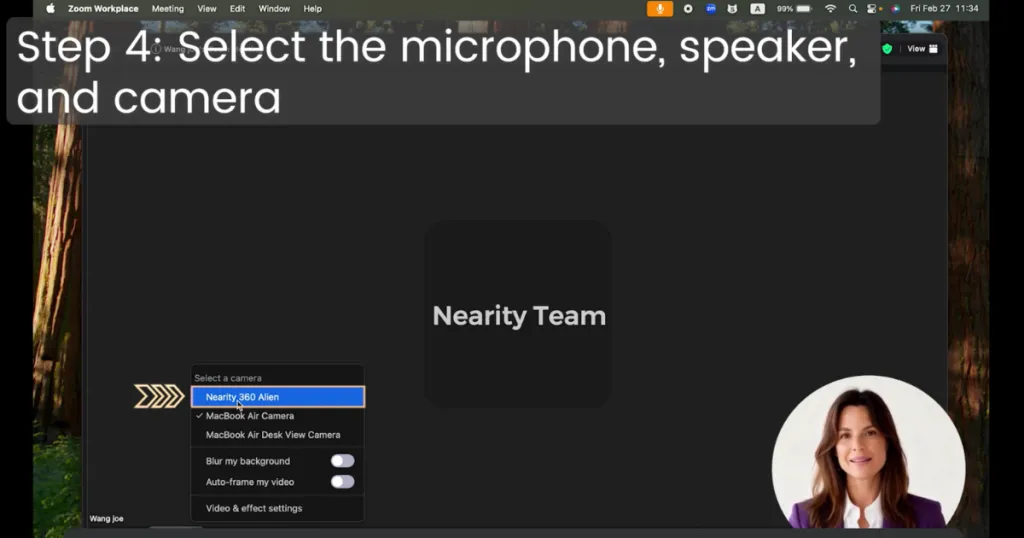
Set up your audio: Go to your app's audio settings. Select Nearity 360 Alien as both your Microphone and your Speaker.
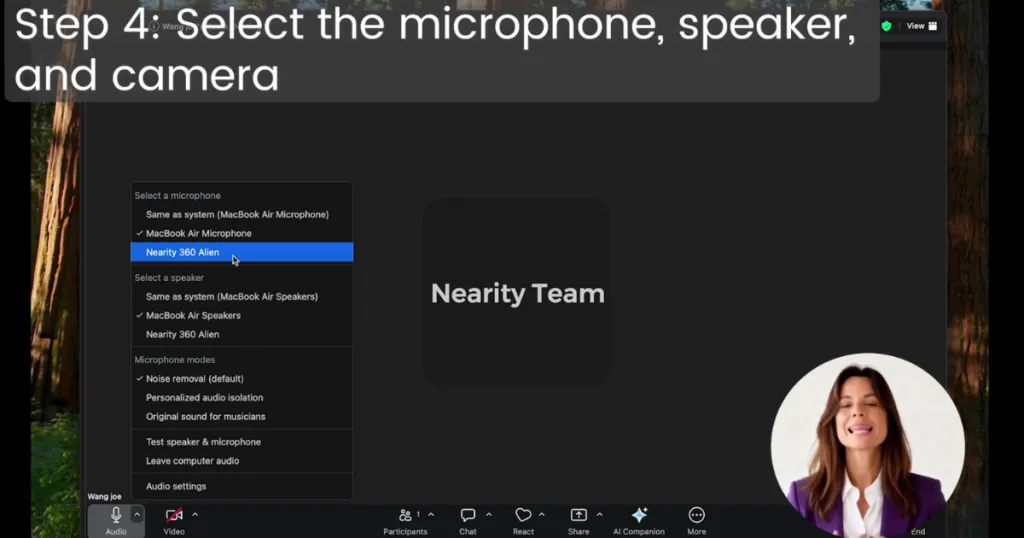
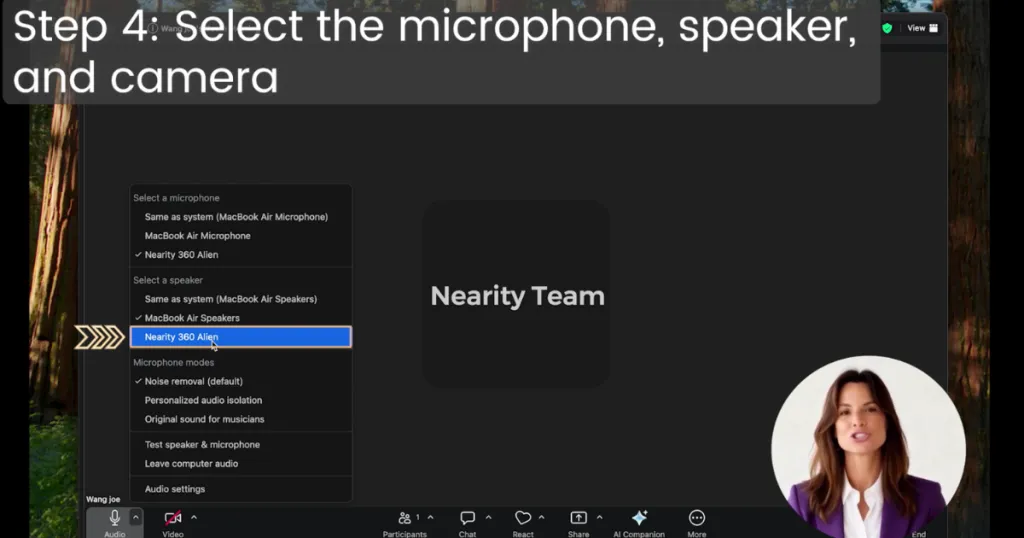
Set up your video: Navigate to your video settings and choose Nearity 360 Alien as your Camera.
You’re Ready to Go!
That’s it! Your camera is fully set up. With everyone clearly visible and the ring light glowing steadily, you are ready to start your meeting.
By simplifying communication and delivering true 4K quality, the Nearity 360 Alien stands out as one of the most effective conference room solutions on the market today.
Expand your meeting possibilities with NearHub!