Medium Conference Room Camera Setup: Stop Guessing at Audio Reach
Choose a medium conference room camera by testing the audio boundary, far-seat framing, expansion microphones, and host workflow.
Meeting Room
Technology
Hybrid Work
Updated: Aug 19, 2026 · 8 minutes read
Global Business, Brought Near.
No Installer, No Hassle, Just Works.
The camera sees all ten people. The remote participant still asks, “Can the person at the far end repeat that?” That is the central problem when choosing a medium conference room camera: video coverage can look complete before audio coverage actually is. Treat the room as an audio-boundary decision first, then verify framing, platform fit, and host workflow around it.
For a 6–12 person room, the winning setup is not simply a camera with a bigger resolution number. It is a system that keeps the nearest and farthest seats visible, gives quiet speakers consistent intelligibility, and has a deliberate expansion path when one pickup point reaches its limit.
This guide shows how to find that limit with a real call, decide whether an expansion microphone is justified, and distinguish a scalable all-in-one setup from a room that needs distributed components.
Why Is Medium-Room Sizing an Audio Decision?
Medium rooms sit in an awkward middle. They are too large to assume every participant is equally close to one device, yet often too compact to justify a complex installed AV system. That creates a temptation to buy by camera specifications and hope the built-in audio follows.
It may not. A camera can include the farthest chair by using a wider composition or higher-resolution sensor. Sound does not behave the same way. A quiet voice loses useful energy with distance, while reflections, HVAC noise, keyboard sounds, and people near the microphone continue to compete. Software processing can improve the captured signal, but it cannot recreate speech that never arrived clearly.
The causal chain looks like this:
A longer table increases the distance between some speakers and the primary microphone.
Greater distance reduces the direct voice relative to room noise and reflections.
Automatic gain may raise the distant voice, but it can also raise the room.
The remote side hears inconsistent levels or tiring reverberation.
Participants repeat themselves, lean forward, or move toward the device.
The system appears to work while changing how people must behave.
A reliable medium room reverses that logic. It starts with the normal human behavior and makes the equipment support it. People should not need to project, reserve one “good” chair, or pass a speakerphone around the table.
The broader conference room setup checklist explains the complete order of room decisions. Here, the focus stays narrow: where a compact room ends, where a distributed large-room design begins, and how audio reveals the boundary.
Define the Medium Room by Distance, Not Its Label
“Medium” is not a universal engineering category. Two rooms with the same area can behave differently because one uses a square table and the other a long rectangle. One may have carpet and acoustic treatment; the other may have glass walls and a hard ceiling. One may seat eight people around a central device; the other may include a presentation area several feet beyond the table.
Create a room map with:
Every normal seat.
The nearest and farthest face from the proposed camera.
The nearest and farthest talker from the primary microphone.
Display and whiteboard positions.
Presenter or standing zones.
Doors, windows, and reflective surfaces.
HVAC vents and other noise sources.
Power, USB, network, and safe cable routes.
The likely location of an expansion microphone.
Then separate the room into conversational zones. A conventional rectangular table may have a near zone, center zone, and far zone. A U-shaped table has side arms and an open presentation area. A flexible room may have one geometry during team meetings and another during training.
Do not average those zones. The average seat rarely causes the failure. The quietest speaker in the farthest normal zone is the useful test condition.
Headcount still matters operationally, but it is a proxy for geometry and conversation load. Twelve people seated compactly around a central capture point may be easier than eight people stretched along a narrow boardroom table. Use headcount to shortlist options, then use occupied distance and room behavior to approve them.
Establish the Audio Boundary With a Remote Test
The audio boundary is the farthest normal point from which typical speech remains consistently intelligible through the actual meeting platform. It cannot be established by standing beside the device and reading a pickup-range claim.
Run this test before permanent installation:
Put the primary device in its proposed position.
Occupy the room with enough people and laptops to resemble a real meeting.
Connect through the platform the room will actually use.
Place a reviewer in another room using ordinary headphones or speakers.
Ask the quietest expected speaker to talk from each zone.
Test normal back-and-forth and brief overlapping speech.
Turn on the HVAC and other normal noise.
Play remote speech into the room to test full-duplex conversation.
Record where intelligibility or level consistency declines.
The remote reviewer should describe observable results:
“The last two words disappear when the far speaker turns toward the display.”
“The near seat is much louder than the far seat.”
“Table taps interrupt the conversation.”
“When both sides speak, one side becomes difficult to follow.”
“The microphone picks up the HVAC more strongly after the far speaker begins.”
These observations are actionable. A vague rating such as “sound quality: 7/10” does not identify whether the cause is placement, acoustics, processing, platform selection, or reach.
Repeat the test after any meaningful change. Moving the device toward the far end may improve one zone but worsen framing or the near-seat experience. Closing blinds or adding soft materials may change reflections. An expansion microphone may improve far-zone speech while introducing table noise. Every solution creates a new system that deserves verification.
Camera Coverage Still Needs a Near-and-Far Test
Audio sets the hidden boundary, but the video must still make every zone useful. A medium room usually has enough depth for people at the far end to appear significantly smaller than people near a front camera.
Evaluate three properties:
Inclusion
Every normal seat appears without participants leaning inward. Inclusion is the minimum requirement, not the final goal.
Recognition
Remote participants can read facial expressions and identify who is speaking. A person who occupies only a tiny part of a very wide room view is technically present but socially diminished.
Continuity
When the system changes views or follows a speaker, the remote side can understand where the person is in relation to the group. Rapid or unnecessary changes can be more distracting than a stable view.
A front-facing camera can produce a familiar boardroom composition and align the lens with the display, but it creates a depth gradient: near participants appear large and distant participants appear small. A table-centered 360-degree camera can reduce that front-to-back distance and better follow table discussion, but it needs a clear placement position and a coherent way to show presentations.
Test both the global room view and any speaker-focused or discussion view you expect to use. A polished demo with one speaker is not enough. Medium-room conversations include interruptions, side comments, and a person speaking while looking at shared content.
Also evaluate backlight. A camera that frames the far end beautifully under controlled light may struggle when that end sits in front of a window. Change blinds and lights as users normally do rather than designing the test only around ideal conditions.
Should You Add an Expansion Microphone?
Add an expansion microphone when it fixes a verified weak zone without creating more operational complexity than the room can support. Do not add it merely because the accessory exists.
Use this decision sequence:
Confirm the failure. Is the far zone consistently difficult to understand through the actual platform?
Test primary placement. Can moving the base device improve the zone while preserving camera composition and near-zone sound?
Check the room. Are reflections or noise the main cause rather than distance?
Place the expansion mic near the weak zone. Do not assume the geometric center is correct.
Repeat all audio scenarios. Test quiet speech, overlapping conversation, remote playback, and table noise.
Review the host experience. Does the added component remain connected and obvious, or will users unplug or move it?
The right location is where the microphone captures weak speakers more directly without sitting beside a laptop fan, paper stack, table-tapping participant, or room loudspeaker. A cable that crosses a chair path is not an acceptable coverage solution. Route it safely and make the expected location easy to restore.
One expansion microphone is often a useful intermediate architecture because it preserves a relatively simple base system while creating a second audio node. But it is not infinitely scalable. If the room has several separated speaking zones, a moving presenter, or an irregular table, one added microphone may simply move the boundary rather than eliminate it.
The honest question is: does the room have one weak zone or several independent zones? One weak zone may suit a single expansion microphone. Several zones point toward distributed audio planning.
Compare the Three Common Medium-Room Architectures
Architecture
Strongest fit
Main advantage
Main trade-off
Warning sign
Front camera with integrated audio
Short, display-led medium room
Familiar perspective and simple front installation
Capture point follows conversation; fewer separate components
Needs central table space and a planned cable path
Laptops block the view or audio boundary exceeds one expansion zone
Distributed camera/audio system
Irregular, multi-zone, presentation-heavy room
Components can be placed for distinct zones
More installation, tuning, support, and cost
Complexity exceeds the organization’s ability to operate it
This is a trade-off matrix, not a quality ranking. A distributed system can solve hard geometry and still be a poor choice for an organization without installation or support capacity. An all-in-one design can simplify ownership and still be the wrong choice for a deep room with separate audience and presenter zones.
Evaluate architecture before brand. Once the architecture fits, compare product-level factors such as image behavior, microphone expansion, connection method, platform support, management, warranty, and total deployment requirements.
Test the Host Workflow Alongside Coverage
A medium room is often shared by more teams than a huddle room, which makes workflow inconsistency more visible. The system must support the actual operating model:
BYOD with a host laptop.
A dedicated room appliance.
A mixed model that permits both.
Several meeting platforms rather than one standardized service.
For BYOD, confirm how the laptop reaches the camera, microphones, speaker, and display. A single USB connection can simplify device selection, but the display may still need HDMI or wireless casting. An optional wireless conferencing link can reduce one physical connection without eliminating power, network, or display requirements.
For a dedicated room appliance, test calendar join, guest meetings, content sharing, and what happens when a platform outside the standard is required. A consistent one-touch workflow is valuable only if it covers the organization’s real meeting mix.
Use a non-installer acceptance test:
Give the host only the instruction that will remain in the room.
Ask them to start a scheduled meeting.
Ask them to join an external meeting on another required platform.
Ask them to share content and room audio.
Disconnect one expected cable or let the display sleep.
Observe whether they can recover.
Do not coach during the test. Every coaching prompt is potential documentation, labeling, or design work.
The workflow score should have equal authority with the coverage score. A technically excellent room that users bypass is not operationally excellent.
A Decision Framework for a 6–12 Person Room
Make the purchase decision in four gates. A candidate advances only when it passes the previous gate.
Gate 1: Geometry fit
All occupied seats remain visible in normal posture.
Nearest faces do not appear uncomfortably distorted.
Farthest faces remain recognizable.
The display and camera do not block each other.
The proposed device position survives normal laptop use.
If the camera cannot create a useful composition, do not try to fix the room with audio accessories.
Gate 2: Audio boundary
The quietest speaker is intelligible from the farthest normal zone.
Near and far voices have acceptable consistency.
Overlapping speech remains followable.
Remote and in-room participants can speak naturally in both directions.
Normal HVAC and laptop noise do not dominate.
If the base device fails only one zone, test an expansion microphone. If it fails several zones, reconsider the architecture.
Gate 3: Operating model
The expected host can start without assistance.
Required platforms recognize the room devices.
Content sharing follows a clear path.
Connections are safely routed and labeled.
Recovery from disconnection or sleep is understandable.
A room should not depend on an undocumented expert habit.
Gate 4: Expansion and ownership
The organization knows the maximum room behavior this system will support.
Expansion components have defined locations and cable paths.
Firmware, management, warranty, and support ownership are assigned.
The acceptance test is documented for future room refreshes.
This final gate prevents a medium-room success from being copied blindly into a larger or differently shaped room.
Where an Expandable 360-Degree Setup Fits
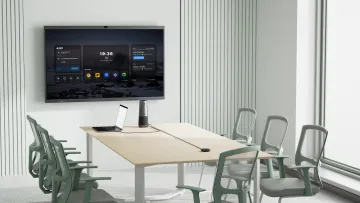
A table-centered 360-degree system can fit a medium room when conversation moves among six to twelve seated participants and one expansion point can cover the weak audio zone. It reduces the front-to-back viewing gradient and can consolidate camera, microphone, and speaker functions.
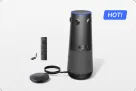
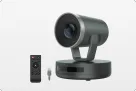
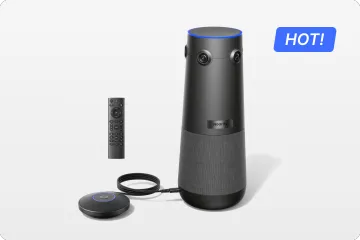
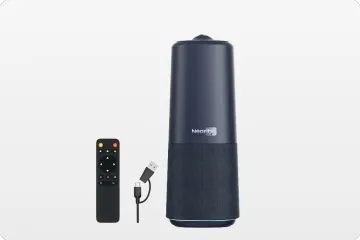
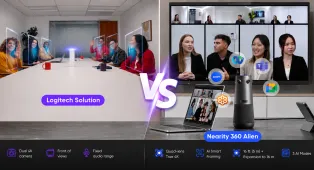
The Nearity 360 Alien provides one implementation of that architecture. Its 360-degree tabletop view reduces the front-to-back viewing gradient, while the supported expansion microphone creates a second pickup point for the verified weak zone.
The official Starter Kit pairs the device with one expansion microphone and is positioned for 6–12 people in approximately 150–300 square feet. These are manufacturer-defined selection ranges, not substitutes for a test in your table geometry and acoustic environment.
The architecture is strongest when the room has one continuous table-centered conversation and one identifiable far audio zone. It is weaker when the room includes a separate presenter area, movable clusters, or multiple acoustic zones that need independent coverage.
If that fit is confirmed, the medium-room video conference solution shows the commercial room configuration. Use the test evidence—not the room label—to decide whether it belongs on the shortlist.
Devil’s Advocate: When One Expansion Mic Is Not Enough
It is tempting to think of expansion microphones as range extenders that can turn any room into a larger version of the same system. Real rooms are not linear.
A single added microphone may be insufficient when:
A U-shaped table creates two separated side conversations.
A presenter moves between the display, whiteboard, and audience.
Flexible furniture produces a different weak zone every day.
The room is much deeper than it is wide.
Dividers change the acoustic volume.
One zone needs speech reinforcement as well as conferencing capture.
The organization requires production-style camera angles.
In these cases, distributed ceiling or table microphones, a digital signal processor, multiple cameras, or presenter tracking may be appropriate. Those components allow engineers to assign coverage to distinct zones. They also require design, installation, tuning, and support.
Do not over-engineer a regular boardroom merely to avoid testing a simpler option. But do not under-engineer a multi-zone room because an accessory makes the system look expandable on paper.
The correct threshold is evidence: if one base device plus one sensibly placed expansion microphone passes every normal speaking zone and workflow test, added complexity needs justification. If it does not, stop stretching the architecture.
Common Medium-Room Buying Mistakes
Treating camera resolution as room reach
Resolution affects image detail, not whether distant speech reaches the microphone clearly. Evaluate the combined system.
Using square footage without table geometry
A compact square layout and a long narrow layout can share the same area but create different near/far distances.
Placing an expansion microphone by symmetry
The table center looks neat on a plan. The best pickup location is near the weak conversational zone, subject to noise and cable constraints.
Testing with the loudest employee
Strong speakers conceal the real boundary. Use the quietest expected participant in the farthest seat.
Listening from inside the room
You hear the person directly, not through the microphone, processing, platform, and remote speaker. Always include a remote reviewer.
Ignoring the presentation exception
A table-discussion system may cover seated participants well while failing to show or capture a standing presenter. Test the exception if it is part of normal use.
Adding components without ownership
Every expansion mic, switcher, cable, and room computer needs a stable position and a support owner. Unowned complexity becomes meeting friction.
Medium-Room Acceptance Test
Use this final checklist with the room occupied:
Video
Nearest, farthest, and side seats remain in useful compositions.
Faces remain recognizable during both group and speaker-focused views.
View changes are understandable rather than distracting.
Shared content is readable from the room and remotely.
Window and ceiling-light conditions were tested.
Any presenter or whiteboard zone was tested if normally used.
Audio
The quietest speaker is clear in every normal zone.
Near and far participants have reasonable level consistency.
Natural interruptions remain followable.
Full-duplex conversation works when both sides speak.
Table noise, laptops, and HVAC do not dominate.
The expansion microphone improves the measured weak zone.
Workflow
A non-installer started the meeting.
A second laptop and required platforms were tested.
The intended camera, microphone, and speaker were selected.
Content sharing followed the documented path.
Cable routes are safe and visually clear.
The host recovered from one realistic failure.
Ownership
The room’s supported capacity and layout are documented.
The limit for adding or redesigning audio is explicit.
Support and device-management responsibility is assigned.
The test record can be reused during future changes.
When Should You Choose a Smaller or Larger Design?
Choose a compact design when all seats remain close to one capture point, meetings are spontaneous, and an expansion microphone adds no measurable value. The small conference room camera guide focuses on short-distance framing, table obstruction, and 4–6 person workflows.
Move to a large-room architecture when the room develops multiple independent zones, the table creates substantial depth, one expansion point cannot make far speech consistent, or presentation requirements introduce separate camera origins. The large conference room camera guide treats that problem as a coverage topology rather than a bigger camera purchase.
The medium-room category is useful only if it leads to this decision: one coherent conversational area, one verified audio boundary, and an expansion plan that remains simpler than a distributed installation.
FAQ
What should I look for in a medium conference room camera?
Look for useful framing at the nearest and farthest seats, consistent speech pickup across the occupied table, an audio expansion path, platform compatibility, and a start workflow that an ordinary host can complete. Evaluate the combined room system rather than camera resolution alone.
When does a medium room need an expansion microphone?
Add an expansion microphone when a remote test shows a repeatable weak speech zone that camera or base-device placement cannot solve. Test the quietest expected speaker, normal overlapping conversation, and typical room noise before deciding.
Where should an expansion microphone go in a medium room?
Place it near the weak conversational zone rather than simply at the geometric center. Keep it clear of laptop fans, paper movement, table taps, and loudspeakers, then verify the result through the actual meeting platform.
Can one 360-degree camera cover a medium conference room?
It can cover many table-centered medium rooms when every seat remains visually useful and the audio reaches the farthest talker, sometimes with an expansion microphone. Irregular layouts, presentation zones, or greater depth may require a different or distributed design.
A medium room is ready when the remote side no longer knows where the audio boundary used to be. That result comes from testing the weakest normal seat, expanding only where evidence supports it, and choosing an architecture the organization can operate every day.