























































If you’re not sure how to install the stand, here is the installation introduction for you.
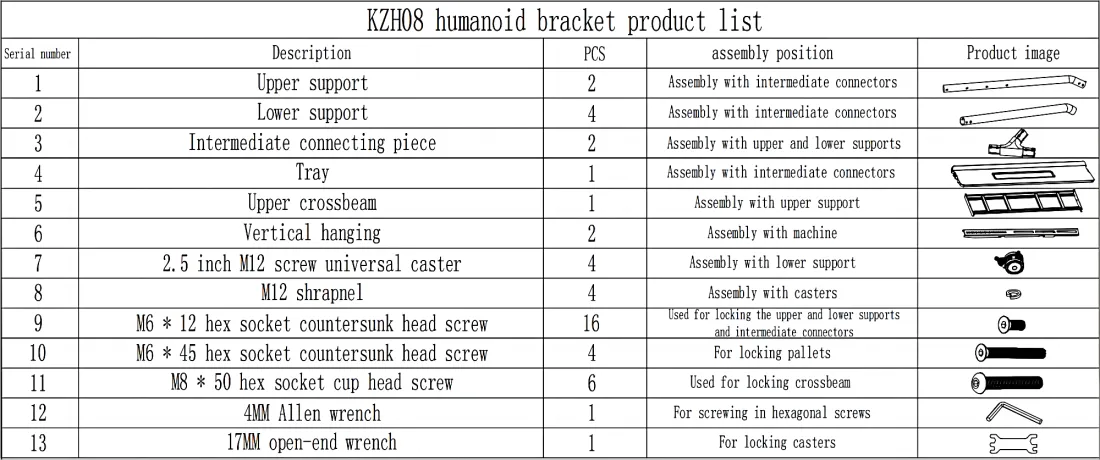
Step 1
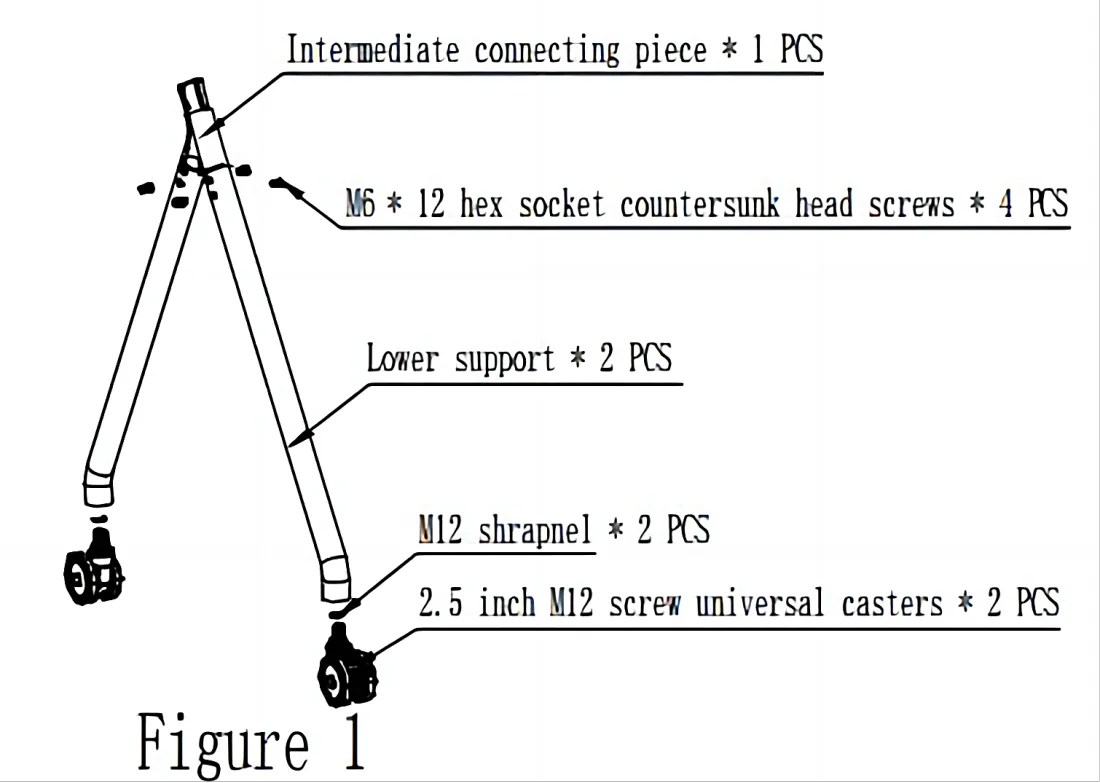
① Install the corresponding products into the state shown in Figure 1, totaling 2 pieces.
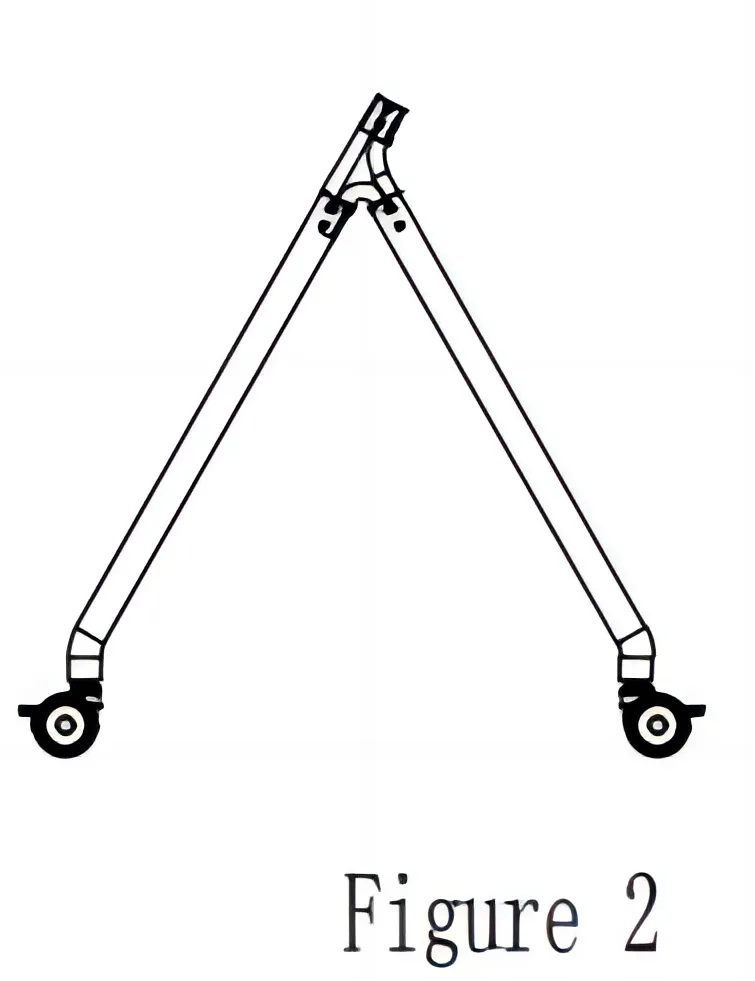
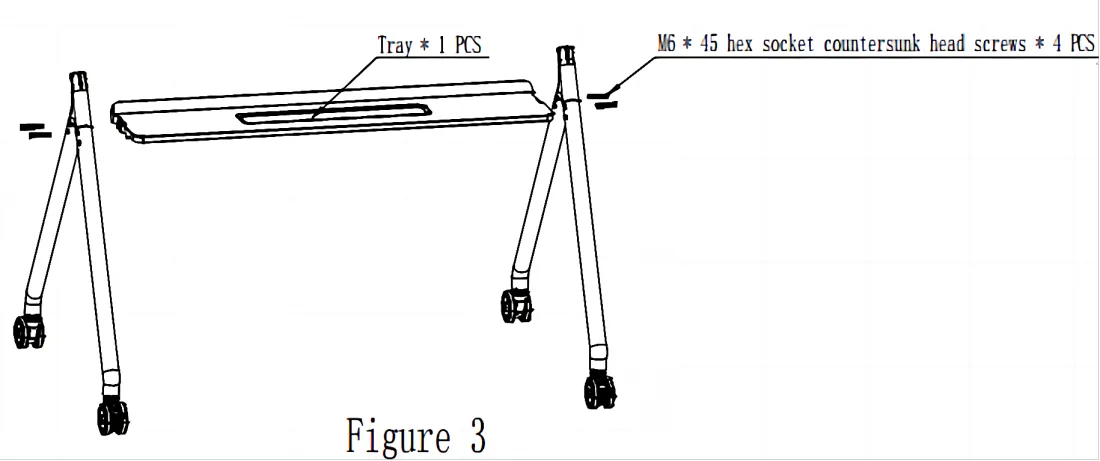
② After the installation is completed in Figure 2, take out the tray and lock it with screws left and right as shown in Figure 3.
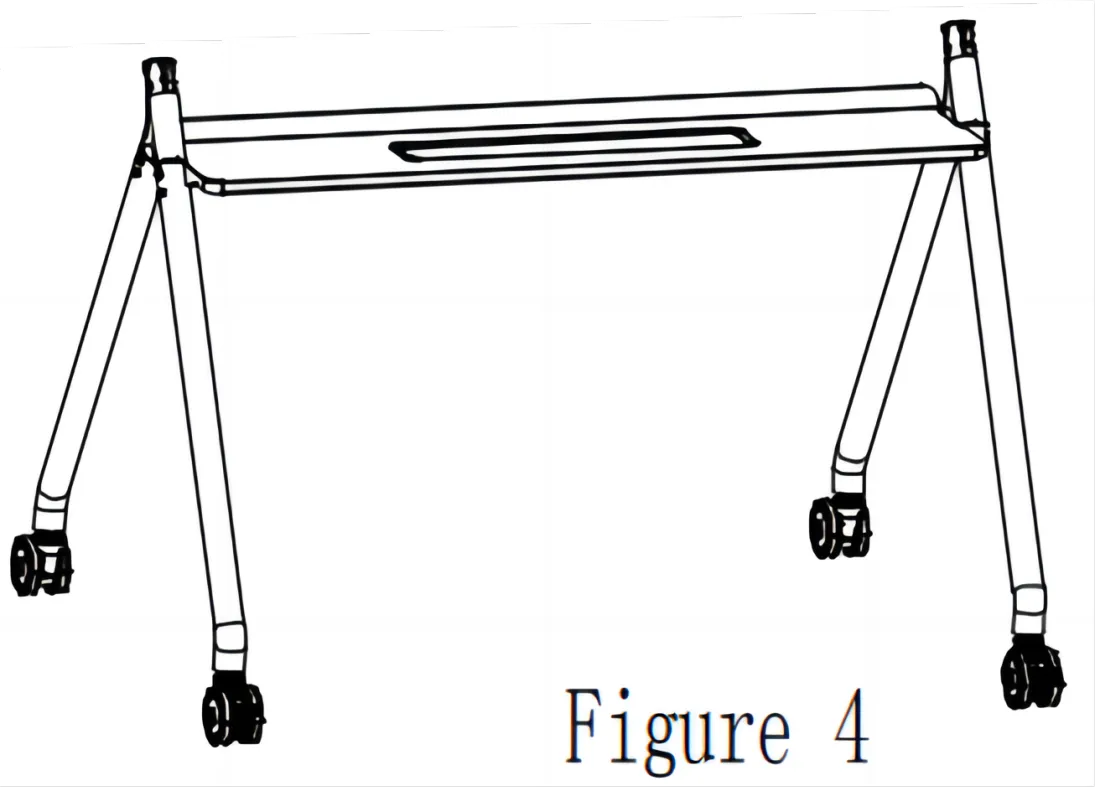
③ The lower half of the bracket is installed as shown in Figure 4.
Step 2
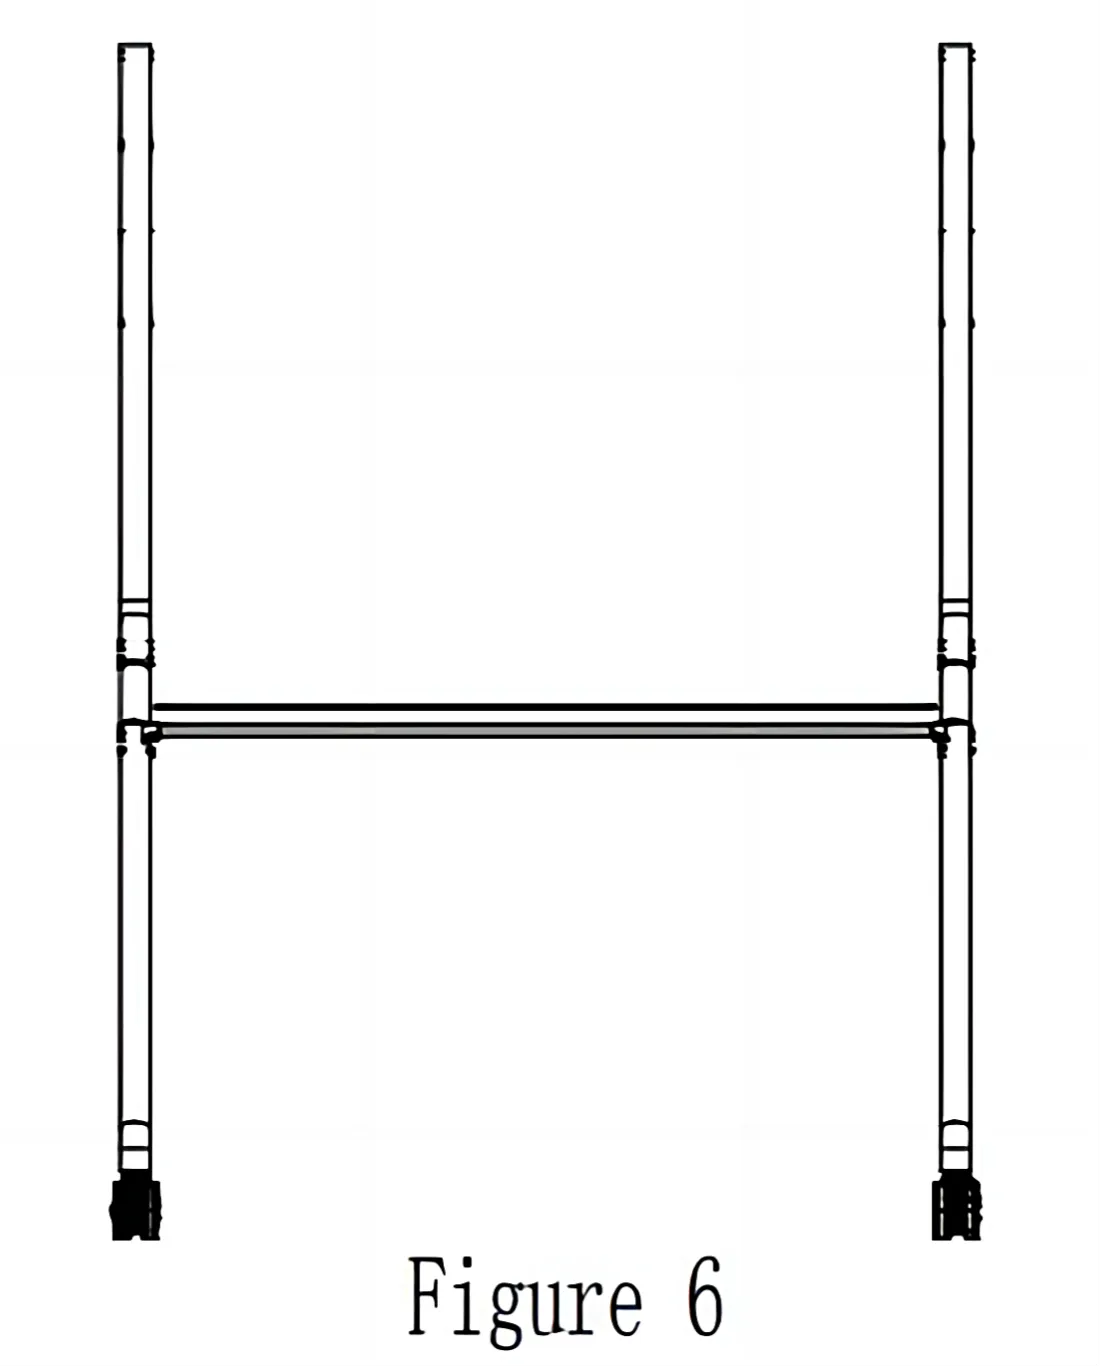
④ Insert the upper support into the middle connecting piece as shown in Figure 5 and lock it with M6 * 12 screws to complete the state shown in Figure 6.
⑤ Take out the upper crossbeam and lock it with three M8 screws on the left and right sides as shown in Figure 7.
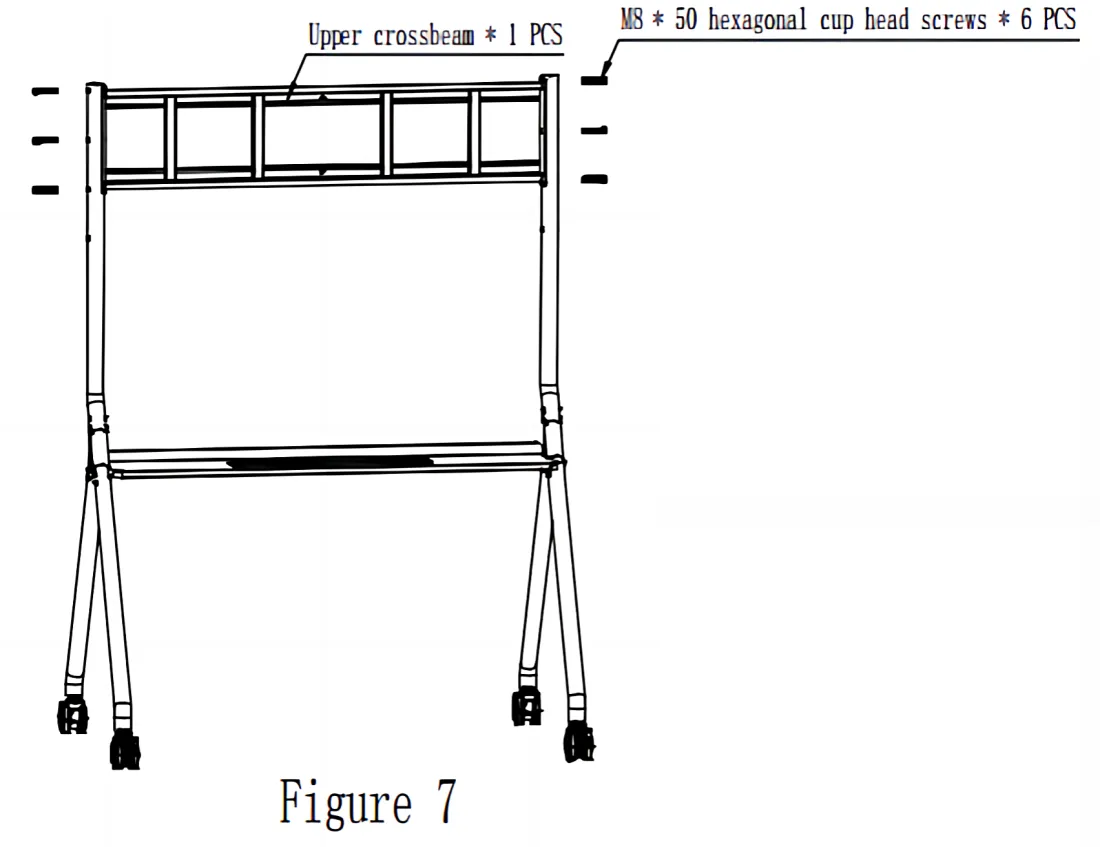
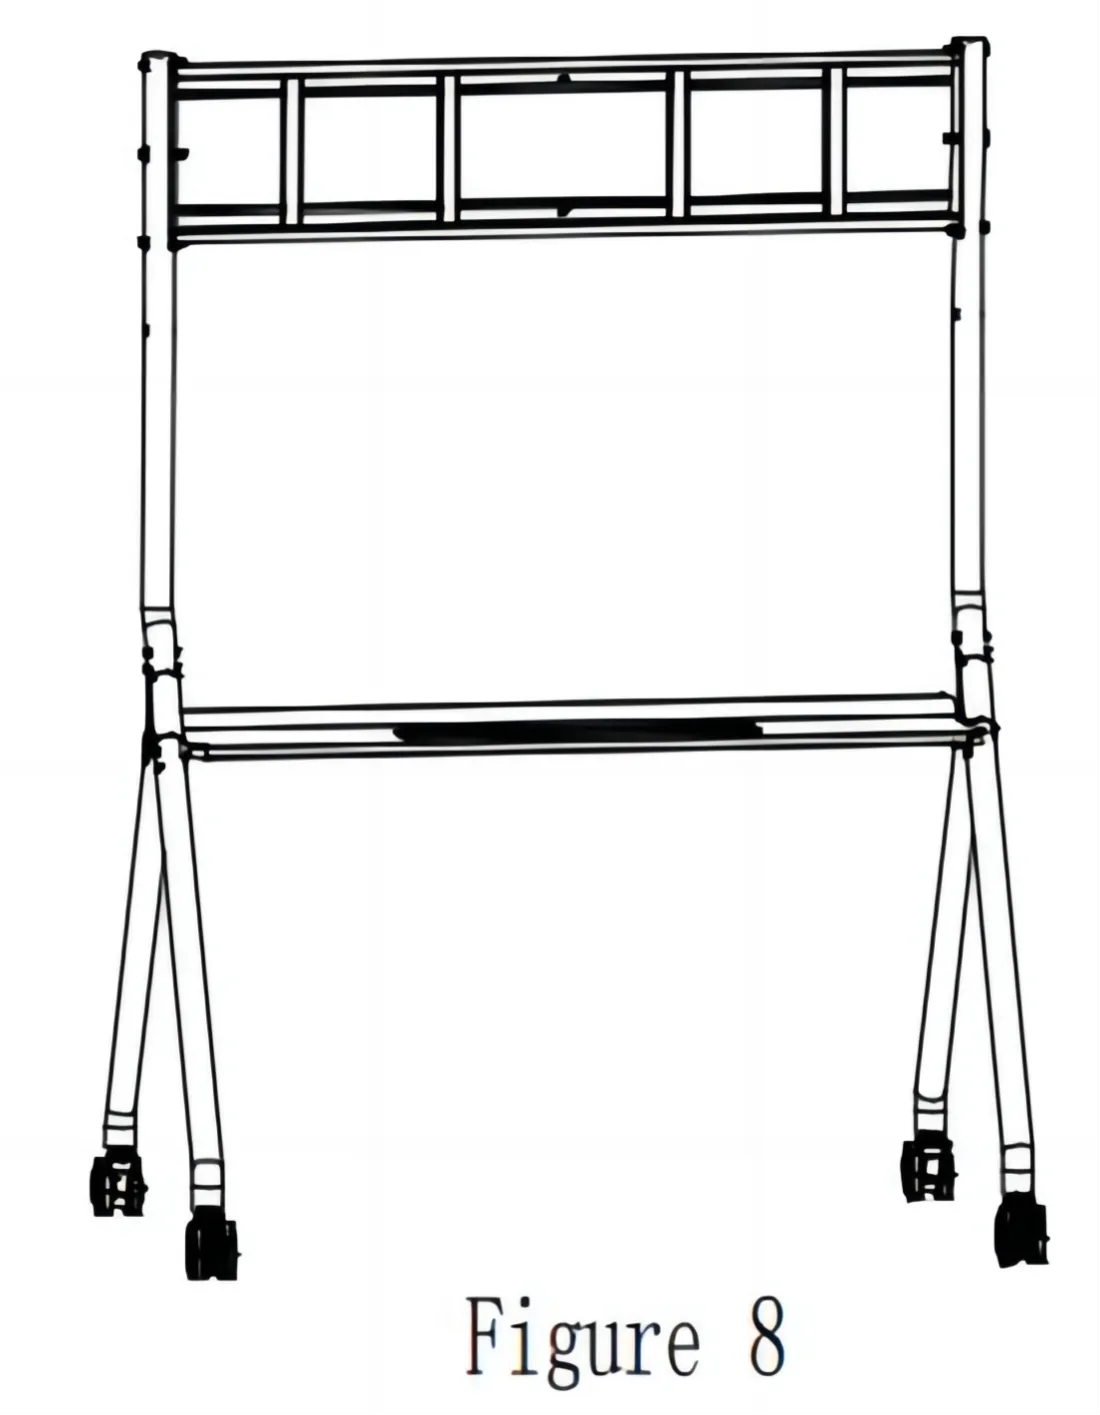
⑥ The bracket installation is completed as shown in Figure 8.
Step 3
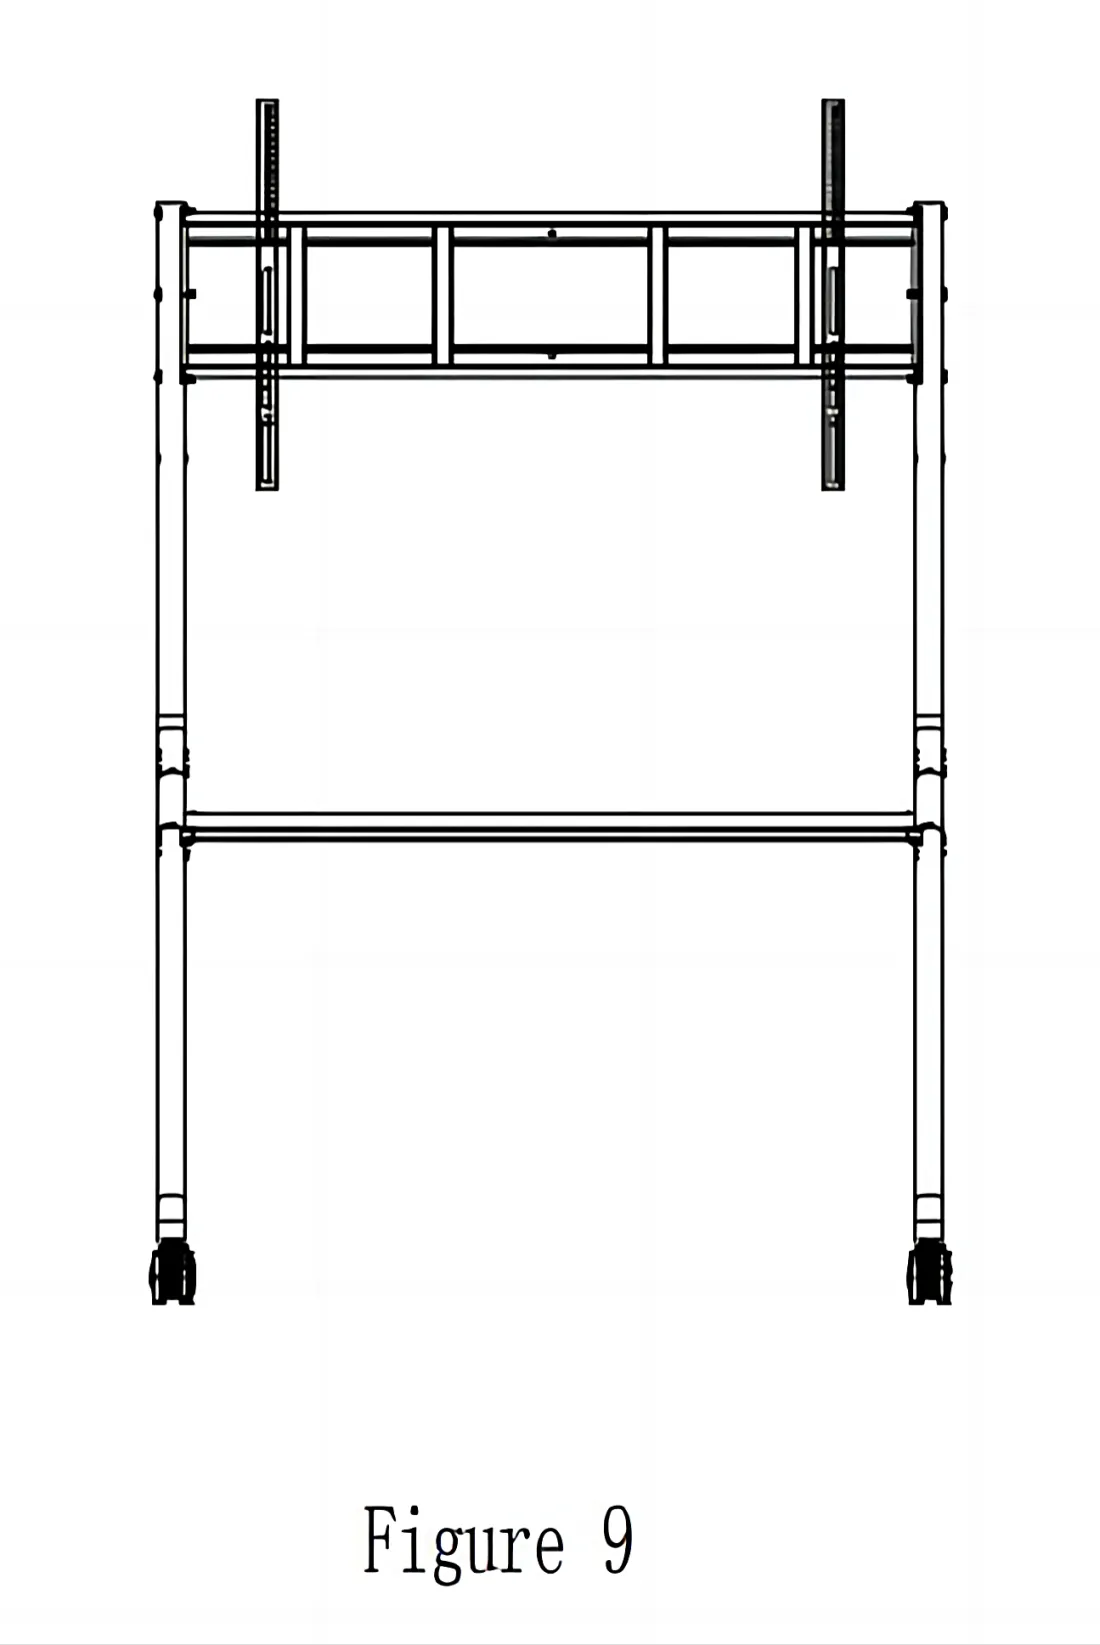
⑦ Take out the standard vertical beam from the packaging box, install the vertical beam on the machine and fix it with M8 * 25 screws (please adjust the upper and lower positions according to personal needs)The schematic diagram is shown in Figure 9.
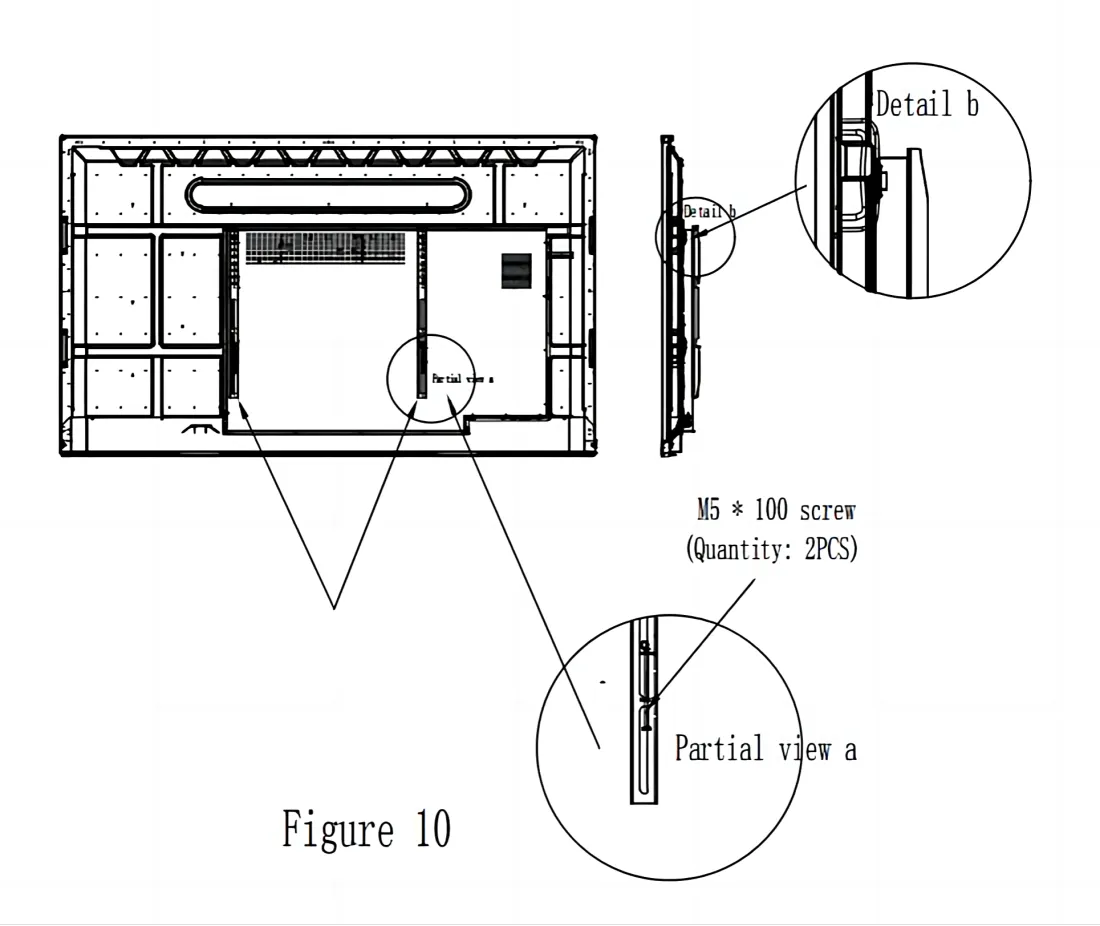
⑧ After fixing the vertical beam, lift the machine and hang it onto the assembled bracket. Adjust the machine to the center position as shown in part Detail b of Figure 10. Tighten the M5 * 100 screw to the top and hang it horizontally, and the installation is complete.
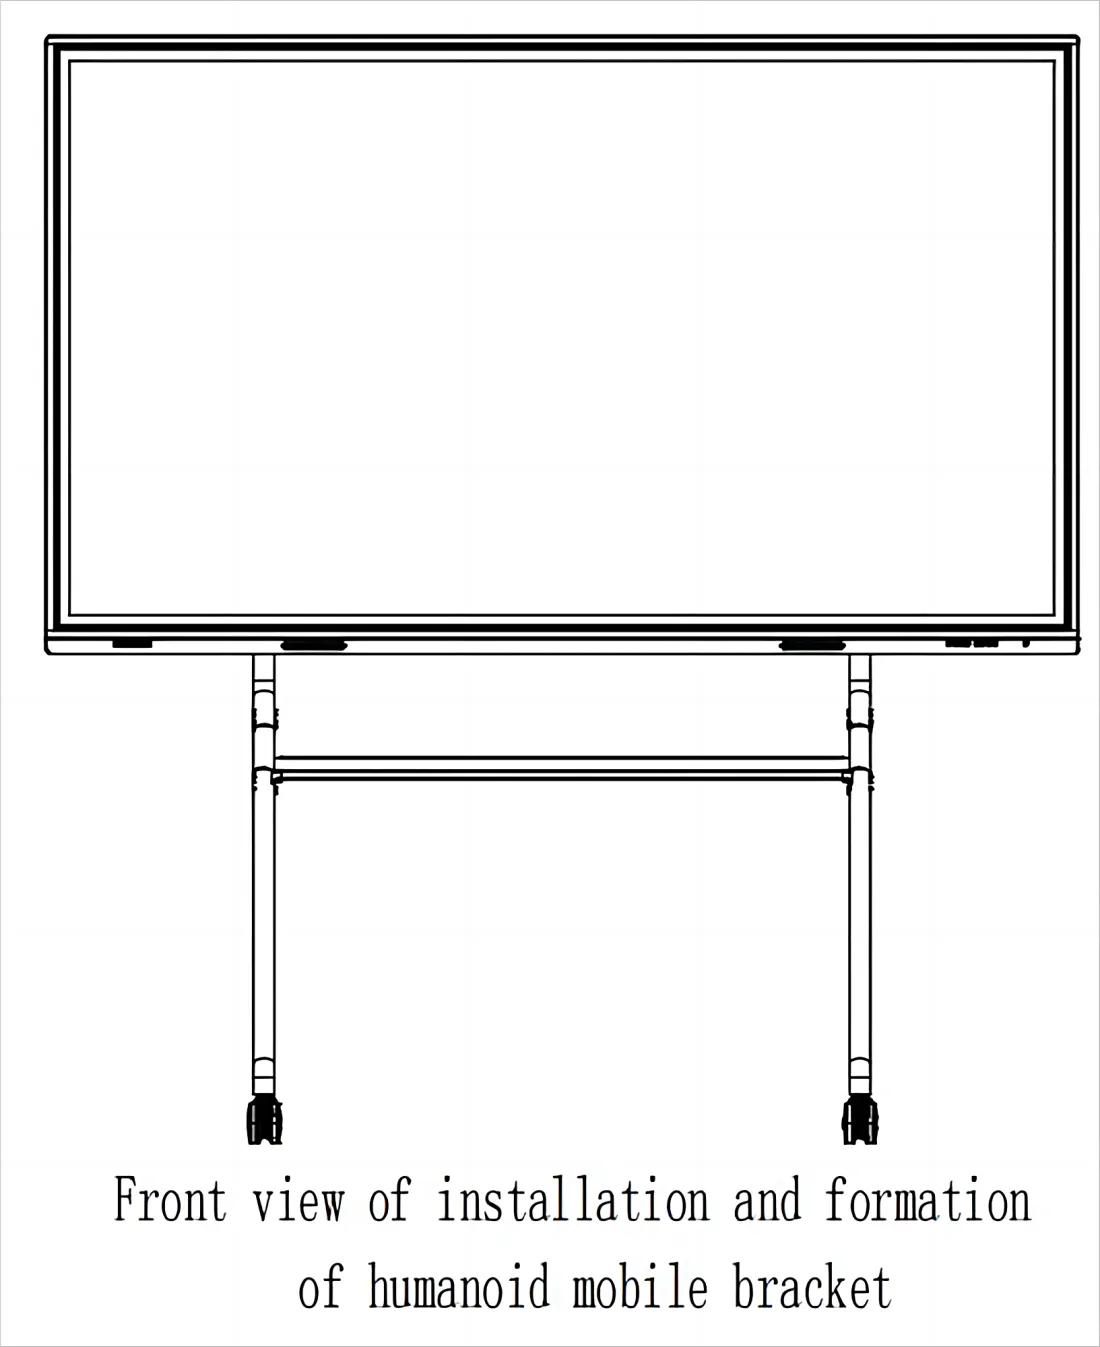
This is the final presentation.
Be careful
- In order to guide the installation of this mobile cart correctly, please read the manual carefully during installation;
- If there are any unclear points when reading or using this manual, please contact our company.
- The illustrations in this manual are for reference only, please refer to the actual product.
If you meet any problems in the process or have any further questions, please submit a support ticket here. Our support team will respond as soon as possible.