


Ask any educator about hybrid teaching, and they’ll likely tell you the same thing: it’s exhausting. Managing a room full of energetic students while simultaneously monitoring a chat box and troubleshooting a laptop is a recipe for burnout. The promise of "flexibility" often feels like a technical trap, where teachers are tethered to a podium just to stay within the camera’s narrow frame. When the technology is clunky and the visuals are limited, the quality of instruction inevitably suffers, leaving both the teacher and the students feeling disconnected.
The solution isn’t more technology—it’s smarter integration. We need tools that work for the teacher, not the other way around. As highlighted in this hybrid meeting technology and equipment guide, the key lies in building a seamless ecosystem where devices communicate effortlessly and reduce operational friction. This guide focuses on eliminating the friction of hybrid setups through professional multicamera integration. We’ll show you how the all-in-one AI smart meeting board transforms from a simple display into a powerful command center, allowing you to capture every instructional nuance and interaction without ever losing your rhythm.
What Makes a Hybrid Classroom Truly Effective
Before diving into equipment and setup, it's essential to understand what separates successful hybrid classrooms from frustrating ones. The goal isn't merely to transmit information—it's to create an inclusive learning environment where every student, regardless of location, can participate fully.
The Three Pillars of Hybrid Learning Success
Effective hybrid classroom technology solutions rest on three foundational elements:
Visual Equity: Remote students must see everything that in-person students see. This includes the instructor, presentation materials, whiteboard annotations, and their fellow students. A single fixed camera pointed at the instructor's face fails this requirement miserably.
Audio Clarity: Every voice in the classroom—whether the instructor at the front or a student asking a question from the back row—must be clearly audible to remote participants. Poor audio is the fastest way to disengage virtual learners.
Interaction Parity: Remote students need the same opportunities to ask questions, participate in discussions, collaborate on projects, and receive individual attention as those physically present.
Achieving these goals requires intentional technology choices. A smart board for hybrid teaching serves as the central hub that ties everything together, but the camera and audio setup determines whether remote students feel like participants or spectators. If you're still evaluating hardware options, this guide to choosing the best whiteboards for classroom use breaks down key factors like surface quality, interactivity, and long-term value to help you make the right decision.
Why Multicam Setups Matter
Single-camera hybrid classrooms inevitably force compromises. Point the camera at the instructor, and remote students miss whiteboard work and classroom interactions. Point it at the whiteboard, and they lose the instructor's presence and non-verbal cues. Attempt to capture both with a wide shot, and everything becomes too small to see clearly.
Multicam hybrid classroom setups solve this problem by providing multiple perspectives that can be switched, combined, or displayed simultaneously. The instructor can focus on teaching while the technology captures every angle that matters.
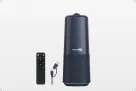
Understanding the NearHub Board S Max
The NearHub Board S Max represents a new generation of interactive displays designed specifically for modern teaching environments. Unlike traditional interactive whiteboards that require separate projectors and computers, the NearHub Board S Max is an all-in-one solution that combines display, computing, and collaboration tools in a single device.
Key Specifications and Features
The NearHub Board S Max combines a 4K interactive display, AI-powered camera, and integrated audio system into a single device, making it a natural centerpiece for hybrid classrooms. Instead of managing multiple disconnected tools, teachers can deliver, capture, and interact from one unified interface.
Why It Works for Multicam Hybrid Teaching
The NearHub Board S Max excels as a hybrid classroom centerpiece for several reasons:
First, its large display serves dual purposes: it shows presentation content to in-person students while displaying the video grid of remote participants. This creates natural opportunities for the instructor to make eye contact with virtual learners simply by looking at the screen.
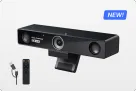
Second, the integrated camera provides one angle in a multicam setup right out of the box, reducing the equipment needed and simplifying initial configuration.
Third, the touch-enabled surface transforms the entire display into an interactive whiteboard, eliminating the need for separate annotation tools while providing a natural writing experience.
Planning Your Multicam Hybrid Classroom Setup
Before purchasing equipment or rearranging furniture, thoughtful planning ensures your hybrid classroom meets your specific teaching needs. The right setup depends on your room size, typical class size, subject matter, and teaching style.
Assessing Your Space and Needs
Start by evaluating your physical classroom:
Room Dimensions: Measure the length, width, and ceiling height. Larger rooms require more powerful cameras and audio equipment. Rooms with high ceilings may need camera mounting solutions that bring lenses to appropriate heights.
Lighting Conditions: Note window placement and existing lighting. Natural light is wonderful for in-person learning but can create backlighting challenges for cameras. Identify whether you'll need additional lighting or window treatments.
Network Infrastructure: Verify that your classroom has reliable, high-speed internet connectivity. Hybrid teaching demands significant bandwidth, especially with multiple video streams. Consider dedicated network lines for critical equipment.
Teaching Style: Reflect on how you typically teach. Do you move around the room frequently? Do you use the whiteboard extensively? Do you facilitate lots of student discussion? Your answers will inform camera placement and quantity decisions.
Determining Camera Requirements
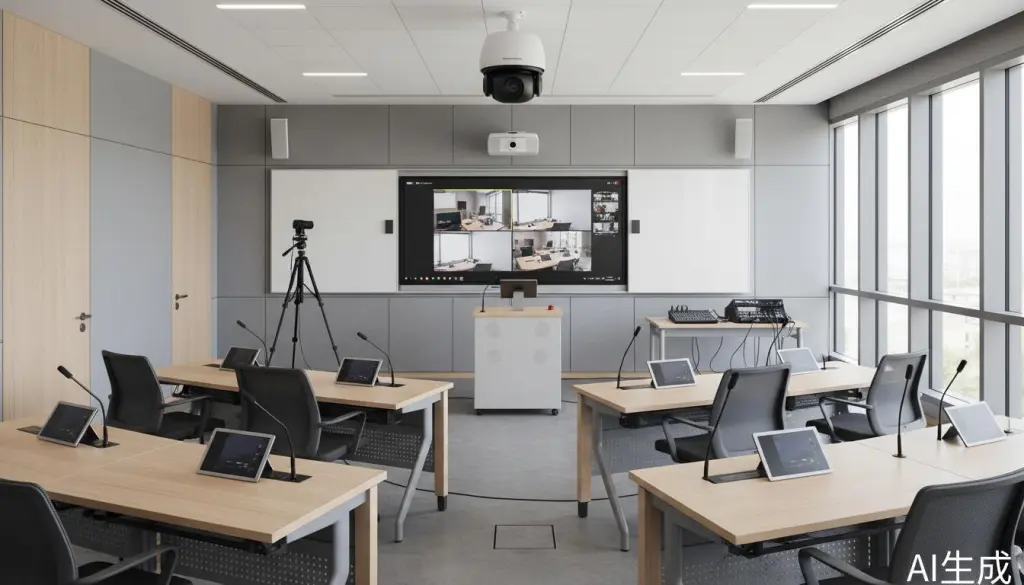
Most effective multicam hybrid classrooms use two to three cameras:
Camera 1: Instructor View: Positioned at the front of the room, this camera captures the instructor and the main display area. The NearHub Board S Max's integrated camera can serve this role, though some instructors prefer a dedicated camera positioned for optimal eye-level framing.
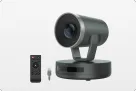
Camera 2: Student View: Positioned to capture in-person student reactions, questions, and interactions. This camera helps remote students feel connected to the classroom community and allows them to see who is speaking during discussions.
Camera 3: Content View (Optional): A dedicated camera for capturing whiteboard work, document camera feeds, or demonstrations that require close-up views. This can be a USB document camera or a dedicated whiteboard camera.
Budget Considerations
Hybrid classroom technology solutions span a wide price range. Here's a realistic breakdown for a quality multicam setup centered around the NearHub Board S Max:
| Component | Budget Option | Mid-Range | Professional |
|---|---|---|---|
| Interactive Display | NearHub Board S Max | NearHub Board S Max | NearHub Board S Max + Secondary Display |
| Secondary Camera | $150 USB Webcam | $400 PTZ Camera | $800+ Professional PTZ |
| Audio Enhancement | Built-in Only | $300 Ceiling Mics | $800+ Professional Array |
| Lighting | Existing | $200 LED Panels | $500+ Professional Kit |
| Mounting/Accessories | $100 Basic | $300 Adjustable | $600+ Professional |
| Total (excl. Board) | $250-450 | $1,000-1,500 | $2,500+ |
Most educators find that the mid-range option provides excellent results without breaking the budget. The NearHub Board S Max's built-in camera and audio handle primary duties, while a quality secondary camera and perhaps some lighting improvements complete the setup.
Step-by-Step Multicam Setup Guide
With planning complete, it's time to implement your hybrid classroom. This section provides detailed instructions for setting up a two-camera system using the NearHub Board S Max as your primary display and camera, plus an external camera for student views.
Step 1: Position Your NearHub Board S Max
The placement of your interactive display affects everything else in your setup.
Optimal Positioning:
- Mount the board at a height where the center of the screen is approximately eye-level for seated students
- Position it so the instructor can stand slightly to one side while still being visible to the built-in camera
- Ensure there's adequate space (at least 6 feet) between the instructor's typical position and the board for proper camera framing
- Consider sight lines for both in-person and remote students
Camera Angle Consideration: The NearHub Board S Max's integrated camera works best when the instructor stands 8-12 feet away. Mark a "teaching zone" on the floor with tape to help you remember optimal positioning during lessons.
Step 2: Install Your Secondary Camera
The secondary camera captures student interactions and classroom atmosphere.
Positioning Options:
Front Corner Mount: Position a camera in the front corner of the room, angled toward the student seating area. This provides a natural view of students as they participate in discussions.
Rear Wall Mount: Mount a camera on the rear wall facing forward to capture both students and the instructor from behind. This creates a "classroom experience" view for remote participants.
Ceiling Mount: For rooms with high ceilings, a ceiling-mounted camera provides an unobtrusive wide view of the entire classroom.
Technical Setup:
- Connect your secondary camera to the NearHub Board S Max via USB (for webcams) or HDMI (for cameras with video output)
- If using a PTZ (Pan-Tilt-Zoom) camera, connect the control cable and test movement ranges
- Position the camera at approximately student eye level when possible
- Test the view on the NearHub Board S Max display to ensure proper framing
Step 3: Configure Audio for Everyone
Clear audio is arguably more important than perfect video. Remote students will tolerate slightly grainy video, but poor audio makes participation impossible.
Using NearHub Board S Max Audio: The built-in microphone array works well for small to medium classrooms (up to 25 students). Position the board centrally and ensure the instructor speaks facing the display when addressing remote students.
Enhancing with External Microphones: For larger classrooms or better audio quality:
- Add ceiling-mounted microphones above student seating areas
- Connect them to the NearHub Board S Max via USB audio interface
- Configure your video conferencing software to use the external mics
- Test audio levels with someone speaking from various locations in the room
Speaker Placement: The NearHub Board S Max's built-in speakers work well for most classrooms. For larger spaces, consider adding external speakers positioned to provide even coverage without feedback.
Step 4: Optimize Lighting
Good lighting dramatically improves video quality without expensive camera upgrades.
Natural Light Management:
- Use blinds or shades to control window light and prevent backlighting
- Position the instructor so windows are to the side or front, not behind
- Consider the time of day you typically teach and how sunlight changes
Artificial Lighting:
- Add LED panel lights positioned to illuminate the instructor's face evenly
- Avoid overhead lights that create shadows under eyes and chins
- Use daylight-balanced bulbs (5000K-6500K) for natural-looking video
Step 5: Configure Your Video Conferencing Software
With hardware in place, configure your software for multicam operation.
Zoom Configuration:
- Open Zoom settings and navigate to Video
- Select the NearHub Board S Max camera as your primary video source
- Enable "Use dual monitors" if you have a secondary display
- In Advanced settings, enable "Use hardware acceleration for video processing"
- Test both cameras using the "Test Video" feature
Microsoft Teams Setup:
- Open Teams settings and select Devices
- Choose the NearHub Board S Max camera as your camera source
- Configure audio to use the board's microphone array and speakers
- Enable "Noise suppression" for cleaner audio
- Test the complete setup with a practice call
Camera Switching: Most video conferencing platforms allow you to switch between cameras during meetings. Practice switching between your instructor camera and student camera smoothly, or use OBS Studio (free) to create a professional multicam feed that combines both views.

Advanced Multicam Techniques
Once your basic setup is working, these advanced techniques can elevate your hybrid teaching to the next level.
Picture-in-Picture Layouts
Using OBS Studio or similar software, create professional layouts that show multiple camera angles simultaneously:
Presenter + Content: Show the instructor in a corner overlay while the main view displays whiteboard content or presentation slides.
Instructor + Students: Display both the instructor and student views side by side, helping remote participants feel more connected to the classroom.
Triple View: Combine instructor, students, and content in a three-panel layout for comprehensive coverage.
Automated Camera Switching
PTZ cameras with preset positions can automatically switch based on audio cues:
- Set preset positions for the whiteboard, instructor area, and student sections
- Configure the camera to switch to the speaker's location when they talk
- Set return-to-home timing so the camera defaults to instructor view when no one is speaking
Recording and Streaming
The NearHub Board S Max supports direct recording to USB storage or network drives:
- Connect a USB drive to the board's USB port
- Use the built-in recording app to capture lessons
- Recordings include both the display content and camera feeds
- Upload recordings to your learning management system for asynchronous access
For live streaming to platforms like YouTube or Facebook:
- Use OBS Studio to combine your camera feeds
- Add your streaming platform's stream key
- Go live directly from your classroom
Troubleshooting Common Issues
Even well-planned hybrid classrooms encounter problems. Here's how to address the most common issues.
Video Quality Problems
| Issue | Possible Causes | Solutions |
|---|---|---|
| Grainy or pixelated video | Insufficient lighting, low camera resolution | Add lighting, upgrade camera, reduce digital zoom |
| Choppy video | Insufficient bandwidth, CPU overload | Close unnecessary applications, upgrade internet, lower video resolution |
| Poor color accuracy | Incorrect white balance, mixed lighting | Set manual white balance, standardize lighting temperature |
| Backlit subjects | Windows or bright lights behind instructor | Reposition instructor, add front lighting, use window treatments |
Audio Issues
| Issue | Possible Causes | Solutions |
|---|---|---|
| Echo or feedback | Speaker audio feeding back into microphone | Lower speaker volume, reposition microphone, use headphones |
| Muffled or distant sound | Microphone too far from speakers | Add external microphones, have speakers move closer to mic |
| Background noise | HVAC, traffic, student chatter | Enable noise suppression, add acoustic treatment, use directional mics |
| Audio/video sync issues | Processing delays, network latency | Use wired connections, reduce video processing, update drivers |
Best Practices for Engaging Hybrid Instruction
Technology enables hybrid teaching, but pedagogy determines its success. These best practices help ensure all students remain engaged regardless of location.
Create Routines That Include Everyone
Start Each Class with a Check-In: Greet both in-person and remote students by name. Ask remote students to unmute and share something briefly at the start to establish their presence.
Use the Display Intentionally: Position yourself so you face the camera when addressing remote students. When speaking to the class as a whole, stand where both groups can see you easily.
Monitor the Remote View: Keep the video grid of remote students visible on part of the display. Watch for confused expressions, raised hands, or technical difficulties.
Facilitate Inclusive Discussions
Call on Remote Students Explicitly: Remote students can't use body language to signal they want to speak. Regularly invite their participation with specific questions.
Use Digital Tools for Equal Participation: Polling tools, collaborative whiteboards, and chat features give remote students the same participation opportunities as those in the room.
Repeat or Summarize: When an in-person student asks a question or makes a comment, briefly summarize it for remote students who might not have heard clearly.
Design Activities for Both Groups
Breakout Rooms: Mix in-person and remote students in virtual breakout rooms for group work. This prevents the formation of two separate classroom cultures.
Shared Digital Workspaces: Use tools like Google Docs, Miro, or NearHub's built-in collaboration features where all students can contribute simultaneously.
Rotation Systems: For hands-on activities, create systems where remote students can guide in-person partners or contribute through shared cameras.

Implementation Checklist
Use this checklist to ensure you've covered all essential elements of your multicam hybrid classroom setup:
Planning Phase
- [ ] Assessed room dimensions and lighting conditions
- [ ] Verified network infrastructure and bandwidth
- [ ] Determined camera requirements based on teaching style
- [ ] Established budget and equipment priorities
- [ ] Planned furniture arrangement for optimal sight lines
Equipment Setup
- [ ] Installed and positioned NearHub Board S Max
- [ ] Mounted and connected secondary camera(s)
- [ ] Configured audio system (built-in or external)
- [ ] Optimized lighting for video quality
- [ ] Organized cables and created clean installation
Software Configuration
- [ ] Installed and configured video conferencing platform
- [ ] Tested camera switching and multicam layouts
- [ ] Configured audio input/output settings
- [ ] Set up recording and streaming if needed
- [ ] Created preset camera positions (for PTZ cameras)
Testing Phase
- [ ] Conducted test call with remote participant
- [ ] Verified audio clarity from all classroom locations
- [ ] Tested camera views and switching
- [ ] Confirmed screen sharing and annotation works
- [ ] Practiced common teaching scenarios
Training and Documentation
- [ ] Created simple startup/shutdown procedures
- [ ] Documented troubleshooting steps for common issues
- [ ] Trained instructors on basic operation
- [ ] Established support contacts for technical issues
- [ ] Scheduled regular equipment checks
FAQ: NearHub Board S Max for Remote Collaboration
What makes NearHub Board S Max different from other digital whiteboards?
NearHub Board S Max runs on Windows 11 Pro, providing full compatibility with desktop applications like Microsoft Office, Adobe Creative Suite, and native Zoom Rooms. Its AI Gallery View camera with 130° ultra-wide field of view ensures remote participants have equal presence in hybrid meetings, unlike Android-based alternatives with limited app support.
How does the AI Gallery View improve remote team collaboration?
The AI Gallery View uses intelligent framing to display each remote participant individually with equal prominence, creating a face-to-face experience. This eliminates the "observer effect" where remote team members feel disconnected, boosting engagement and decision-making efficiency by up to 40%.
Can NearHub Board S Max integrate with existing video conferencing setups?
Yes, the S Max offers full compatibility with professional A/V hardware from Logitech, Polycom, Yealink, and more. It supports native Zoom Rooms, Microsoft Teams, Google Meet, and Webex, making it easy to integrate into existing conference room environments without replacing your entire setup.
What is the whiteboarding experience like on NearHub Board S Max?
The S Max features 40-point multi-touch with a 5ms response time, providing a natural pen-on-paper feel. The infinite canvas allows real-time collaboration from any device, with automatic cloud saving, interactive comments, stickers, and annotations. Multiple users can write simultaneously for dynamic brainstorming sessions.
Is NearHub Board S Max suitable for enterprise IT management?
Absolutely. The S Max supports Microsoft Intune for centralized device management, allowing IT teams to configure networks, enroll devices, manage updates remotely, and control app access. It also integrates with SSO solutions like Okta and Microsoft Azure AD for unified identity protection.
Conclusion: Transforming Remote Collaboration
The NearHub Board S Max represents a significant leap forward in remote team collaboration technology. By combining the familiarity and power of Windows 11 Pro with AI-enhanced video conferencing and intuitive digital whiteboarding, it addresses the core challenges that have plagued distributed teams for years.
The key to successful implementation isn't just the hardware—it's how you integrate it into your team's workflow. Start with the setup recommendations in this guide, implement the remote teamwork strategies that fit your organization, and continuously refine your approach based on what works best for your team.
For teams ready to move beyond the limitations of laptop-based video calls and mobile-app whiteboarding, the NearHub Board S Max offers a comprehensive solution that brings the energy and engagement of in-person collaboration to remote work environments.
To learn more about the NearHub Board S Max or schedule a demo for your organization, visit the official product page.


