


Feeling intimidated by a blank whiteboard? You’re not alone. Many brilliant minds freeze when it’s time to visualize their ideas, believing that drawing is a skill reserved for artists. This guide is here to change that. We’ll demystify the process of creating engaging visuals by breaking it down into simple, manageable steps. Forget complex art theory—you’ll learn how to master the basic building blocks of drawing, use simple icons to communicate complex ideas, and apply professional techniques for color and organization. Whether you’re a teacher, a team leader, or a creative professional, this article will give you the confidence and skills to turn any whiteboard into a powerful tool for communication and collaboration.
Have you ever stood in front of a gleaming, blank whiteboard, marker in hand, with a dozen brilliant ideas swirling in your head, only to freeze? The pressure is on. Your team is looking at you, waiting for that spark of genius to be visualized. You want to draw a simple diagram, a quick sketch, or a mind map, but a nagging voice whispers, “I can’t draw.”
You’re not alone. So many of us feel that creating a visually appealing drawing is a talent reserved for “artists.” We end up with messy scribbles, disproportionate shapes, and text that looks like a doctor’s prescription. Our attempts to clarify an idea with a drawing end up making it more confusing. The result? Disengaged audiences, misunderstood concepts, and a brilliant tool—the whiteboard—reduced to a glorified notepad.

But what if we told you that creating easy whiteboard drawings has less to do with innate artistic talent and more to do with learning a few simple techniques? What if you could transform that intimidating white space into a dynamic canvas for your ideas, making your presentations, lessons, and brainstorming sessions more engaging and effective than ever before?
This is your ultimate guide. We’re going to demystify the world of whiteboard art. Forget complex theories and impossible standards. We’ll walk you through everything from the basic building blocks of drawing to step-by-step tutorials for visuals you can use today. Get ready to unlock your hidden creative potential and become the whiteboard wizard you were always meant to be.
The Surprising Power of Whiteboard Art in Communication
Before we dive into the “how,” let’s talk about the “why.” Why should you even bother learning to make your drawings better? Is it just about aesthetics? Not at all. Effective whiteboard art is a superpower in any professional or educational setting.
Boosts Engagement and Retention: Studies show that humans are visual creatures. We process images 60,000 times faster than text. When you draw something on a whiteboard, you capture your audience’s attention instantly. A simple, well-drawn icon or diagram can make a point stick in someone’s memory far longer than a bullet point on a slide.
Simplifies Complex Ideas: How do you explain a complex user flow, a new business strategy, or a biological process? Words can get tangled, but a simple flowchart or a diagram can bring clarity in seconds. Easy white board drawing is the art of turning complexity into simplicity.
Fosters Unprecedented Collaboration: A whiteboard is a shared space. When you start drawing, it invites others to join in, add their ideas, and build upon the visual conversation. This collaborative energy is crucial for brainstorming, problem-solving, and team building.
Sparks Creativity and Innovation: Doodling isn’t just for fun; it’s a scientifically-backed way to improve focus and spark new ideas. The act of drawing frees your mind from linear thinking, allowing you to make new connections and see problems from different angles.

Your Toolkit for Easy Whiteboard Drawings: From Analog to Digital
To create great art, you need the right tools. The good news is, you don’t need a fancy art store haul. Let’s break down the essentials.
The Traditionalists: Classic Dry-Erase Boards
For the classic experience, you’ll need:
Quality Markers: Don’t skimp here! Cheap markers are often faint, dry out quickly, and are hard to erase. Look for low-odor, high-quality brands.
Tip Type: You’ll want both bullet tips (for consistent lines and writing) and chisel tips (for varied line widths and filling in shapes).
Colors: Start with a core set: black, blue, red, and green. Black is your workhorse for outlines and text. Blue is great for secondary information. Red is perfect for highlighting and drawing attention. Green works well for positive indicators or alternate ideas.
A Good Eraser: A clean felt eraser is essential. For stubborn marks (or “ghosting”), a microfiber cloth with a bit of whiteboard cleaning spray works wonders.
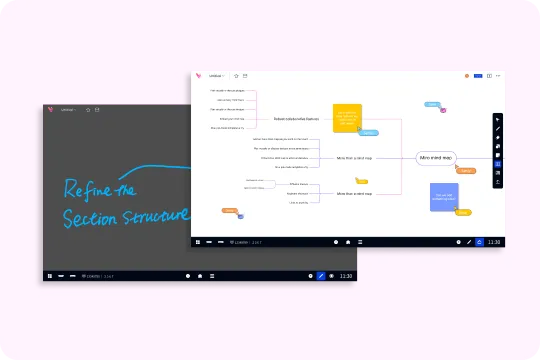
The Digital Revolution: The Future of Whiteboarding
While traditional whiteboards are great, they have limitations. You can’t save your work (unless you take a blurry photo), you can’t undo a mistake without erasing, and the physical space is finite. This is where modern technology shines.
An interactive digital white board like the NearHub Board S55 changes the game entirely. Imagine having:
An Infinite Canvas: Never run out of space again. Just scroll or zoom to find a new area for your ideas.
The Magic of “Undo”: Drew a crooked line? Made a spelling error? Just tap “undo.” No smudges, no ghosting, no stress.
A Palette of a Million Colors: You’re not limited to four marker colors. Choose any shade you can imagine to make your drawings pop.
Layers and Objects: Group elements, move them around, and resize them with ease. This allows for a level of organization and refinement that’s impossible on a physical board.
Save and Share Instantly: With a single click, you can save your entire session as a high-resolution image or PDF and email it to your team. The collaboration doesn’t end when the meeting does.
Switching to a digital platform elevates your ability to create clean, professional, and easy whiteboard drawings exponentially.

How to Master Easy White Board Drawing: The Building Blocks
Ready to draw? Let’s start with the absolute basics. Professional artists know that every complex image is just a combination of simple shapes. Master these, and you can draw anything.
1. The Five Foundational Elements (The “Visual Alphabet”)
Forget about drawing a perfect portrait. Think simpler. All you need to master are these five elements:
The Dot: A simple point.
The Line: Straight, curved, wavy, or zig-zag.
The Angle: Two lines meeting at a point.
The Arc: A simple curve.
The Circle/Oval: A closed loop.
Practice drawing these over and over. Fill a whole whiteboard with them. Get comfortable with the feel of the marker (or stylus) and the motion of your arm.
2. Combining Shapes to Create Objects
Now for the magic. Let’s combine these shapes.
A House: A square (angle + lines) with a triangle (angle + line) on top.
A Person (Stick Figure): A circle for the head, a line for the body, and more lines for arms and legs.
A Sun: A circle with straight lines radiating from it.
A Car: Two circles with a rectangle and an arc on top.
See? You’re already creating recognizable whiteboard art! The key is not to see a “car” but to see the simple shapes that make up the car.
3. The Art of Simple Lettering
Your handwriting on a whiteboard matters. Messy text can ruin a great drawing.
Write Big: Use your whole arm, not just your wrist. This creates smoother, more legible letters.
Use All Caps: For headers and key points, writing in simple, clean capital letters is often more readable from a distance than cursive or lowercase.
Give it a “Font”: For titles, try “bubble letters” (draw the outline of the letter and leave it hollow) or “block letters” (thicken the main strokes of the letter). This adds visual hierarchy.

Step-by-Step Guides for Easy Whiteboard Drawings Anyone Can Do
Let’s put theory into practice. Here are some simple, step-by-step guides for common icons and visuals you can use in your next meeting or class.
Tutorial 1: The “Idea” Lightbulb
Perfect for brainstorming sessions.
Step 1: Draw a circle. This doesn’t have to be perfect.
Step 2: Below the circle, draw a small square or rectangle for the screw base.
Step 3: Inside the rectangle, draw three short, horizontal lines.
Step 4 (Optional): Draw a few short lines radiating from the top of the circle to show it’s “on.”
Tutorial 2: The “People” or “Team” Icon
Great for org charts or representing users.
Step 1: Draw a simple circle for the head.
Step 2: Draw a triangle shape directly below the circle, with the point facing up and touching the head. This is the body. It’s much more stable and clean than a single line.
Step 3: For variety, you can use a rectangle for a “male” icon and a triangle for a “female” icon.
Step 4: Draw a few of these side-by-side to represent a team.
Tutorial 3: The “Action Item” Checkbox and Arrow
Essential for project management and to-do lists.
The Checkbox: Simply draw a square. To show it’s “checked,” draw a simple “V” shape inside it. It’s faster and cleaner than a complex checkmark.
The Arrow: Don’t just draw a line with a “<” at the end. Draw a long, thick rectangle for the body of the arrow, and then add a sharp, clean triangle at the end for the head. This looks much more professional and intentional.
Tutorial 4: The “Growth” or “Finance” Bar Chart
A simple way to visualize data.
Step 1: Draw an “L” shape for your X and Y axes.
Step 2: Instead of flimsy lines, draw solid rectangles of varying heights to represent your bars.
Step 3: Use a chisel-tip marker to fill them in with solid color quickly.
Step 4: Use clean, all-caps lettering to label your axes and bars.
Practicing these simple icons will build your confidence and your visual vocabulary, making your easy whiteboard drawings look polished and professional.

Taking Your Whiteboard Art to the Next Level
Once you’ve mastered the basics, a few pro tips can elevate your drawings from “good” to “great.”
Using Color with Purpose
Don’t just grab a random color. Use a simple color strategy.
Black/Blue: For primary information, outlines, and text.
Green: For positive outcomes, solutions, “go,” or completed items.
Red/Orange: For problems, warnings, urgent items, or things to focus on.
Consistency is Key: Use the same color for the same type of information throughout your drawing. For example, if all “action items” are in green, your audience will intuitively understand.
Creating Visual Hierarchy
Guide your audience’s eyes. Make the most important things stand out.
Size Matters: The most important concept should be the largest drawing or have the biggest title.
Containment: Draw a box or a cloud around a group of related ideas to show they belong together. This simple trick instantly organizes a messy brainstorm.
Connectors: Use arrows and lines to show relationships between ideas. A thick, solid arrow implies a strong, direct connection. A thin, dotted line can show a weaker or potential link.
Ergonomics for Extended Creativity
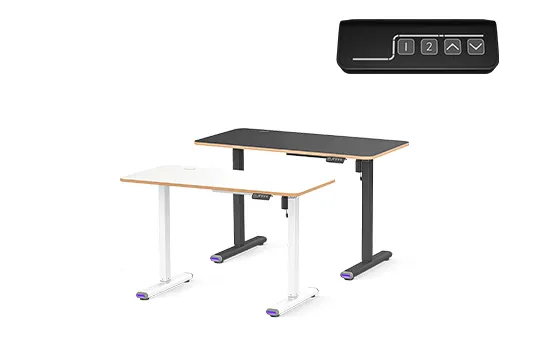
When you’re in the flow, time can fly by. Long sessions of standing and drawing can lead to back and shoulder strain. Pay attention to your posture. For digital whiteboarding sessions that might involve a lot of typing and designing at a desk, an ergonomic setup is crucial. Using a keyboard shelf under desk can help you maintain a neutral wrist and arm position, preventing strain and allowing you to focus on your creative work, not your aching shoulders.
Sharing and Collaboration in the Digital Age
One of the most powerful aspects of digital whiteboarding is the ability to share your work. In the past, you’d have to take a picture and text it. Today, communication is instant. The evolution of sharing ideas from a whiteboard is a lot like how messaging has evolved. The best text program for android has made it seamless to share information instantly with anyone, anywhere. Similarly, an interactive whiteboard lets you export and email a perfect copy of your whiteboard art and notes to the entire team before they’ve even left the room.
Your Easy Whiteboard Drawing Questions Answered (FAQs)
Q1: What’s the best way to start with whiteboard art if I have zero drawing experience?
The absolute best way is to forget about drawing “things” and start with the five foundational elements: dots, lines, angles, arcs, and circles. Spend 15 minutes just practicing these shapes. Then, start combining them into simple objects like stick figures and houses. This builds muscle memory and confidence without the pressure of creating a masterpiece. Your goal is clear communication, not a museum piece.
Q2: Are digital whiteboards like the NearHub board really better for easy whiteboard drawings?
For beginners, absolutely. A digital whiteboard removes the “fear of mistakes.” The undo button is your best friend. It allows you to experiment freely without the frustration of smudging or ghosting. Features like perfect shape tools, a vast color palette, and the ability to resize and move elements mean you can focus on your idea, and the technology helps you make it look clean and professional.
Q3: How can I make my easy white board drawing look cleaner and more organized?
There are three magic tricks for a cleaner look:
Whitespace: Don’t cram everything together. Leave empty space around your elements. It’s like letting your ideas breathe.
Consistency: Use the same style for similar items. For example, all titles are in blue block letters, and all icons are drawn with the same line thickness.
Containers: Use simple boxes and circles to group related information. This is the single fastest way to bring order to a chaotic brainstorm.
Q4: What are the most essential colors to have for basic whiteboard art?
If you’re using a physical whiteboard, you can do almost everything with just four colors:
Black: The workhorse for 80% of your drawing and writing.
Blue: A great secondary color for notes or less important details.
Red: The “attention” color. Use it sparingly for highlights, problems, or urgent points.
Green: The “positive” color. Ideal for solutions, checkmarks, or positive data points.
Conclusion
The blank whiteboard no longer needs to be a source of anxiety. It’s a playground for your ideas, a tool for clarity, and a catalyst for collaboration. Remember, creating easy whiteboard drawings is a learnable skill, not an exclusive talent.
By starting with the basic building blocks, practicing simple icons, and using strategic tools and techniques, you can transform the way you communicate. You can make your meetings more dynamic, your lessons more memorable, and your brainstorming sessions more innovative. Whether you’re using a classic dry-erase marker or tapping into the limitless potential of an interactive digital white board, the principles are the same: start simple, be clear, and have fun.
So, grab a marker (or a stylus), take a deep breath, and draw that first line. You’re not just doodling; you’re communicating, collaborating, and creating. You’ve got this.


