
- Voir les produits

Système Windows
NearHub Board S Pro

Pour les Salles de Réunion Informelles
NearHub Board S55

Pour les Salles Moyennes
NearHub Board S65

Pour les Grandes Salles
NearHub Board S75

Pour les Salles Spacieuses
NearHub Board S86

Cadre Photo Numérique Intelligent avec Moniteur de Qualité d’Air
NearHub Frames 10

NearHub Canvas
Tableau Blanc en Ligne en Temps Réel
- Voir les produits

Véritable Caméra Tout-En-Un 4K 360° pour les Réunions Hybrides
Nearity 360 Alien

Véritable Caméra Tout-En-Un 4K 120° pour la Collaboration d’Équipe
Nearity 120 Max

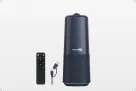
Audio Nouvelle Génération & Daisy-Chain Pionnier
Nearity A20S
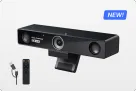
Webcam 4K UHD 120° Pour Réunion Hybride
Nearity V30S
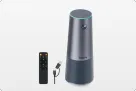
Caméra Tout-En-Un 360° pour les Discussions de Groupe Pro
Nearity C50
Caméra Tout-En-Un pour la Réunion de Groupe
Nearity C45
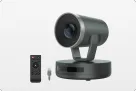
Caméra PTZ Puissante avec Zoom Hybride 10x
Nearity V410
- Voir les produits
- Voir les produits

Pour les Grandes Tailles
NearHub EC20

Pour les Petites Morphologies
NearHub EC10

Bureau Assis-Debout Électrique Avec Hauteur Réglable
NearHub OD20

Double Moteur Bureau Informatique Debout
NearHub OD30

Chariot TV Mobile Pour Écrans De 26 À 70"
NearHub TC30

Bras pour Moniteur Simple Pour les Écrans de 13 à 32”
NearHub MA10

Bras pour Double Moniteur pour les Écrans de 13 à 32”
NearHub MA20

Bras pour Moniteur Simple pour les Écrans de 13 à 35
NearHub MA30

Support de Bureau pour Double Moniteur pour les Écrans de 13 à 35
NearHub MA40

Plateau Clavier Ergonomique
NearHub KD10
- Voir les produits


NearHub Tail is a wireless screen tap that serves as a seamless alternative to conventional HDMI cables. It revolutionizes traditional meeting rooms by facilitating swift screen projection in conference rooms, thereby enhancing their functionality.
The key highlight of NearHub Tail lies in its ability to effortlessly achieve wireless screen projection. This feature, when compared to wired projection, streamlines the initiation of conference room meetings, doing away with the necessity for attendees to pre-prepare by arriving at the conference room in advance.
Key Features of NearHub Tail:
-
Plug & Play functionality for effortless setup.
-
Wireless screen casting for untethered presentations.
-
Three connection options: USB-A, Type-C, and HDMI.
-
Universal compatibility with various devices, including laptops, tablets, and mobiles.

In the subsequent sections, we will provide a brief introduction to NearHub Tail and a step-by-step guide on how to effectively utilize the Tail.
Three connectors of NearHub Tail
As you can see in the picture, the Tail has two cables with three types of connectors. The three connectors are USB-A, Type-C and HDMI from left to right. They are necessary during the pairing and connection procedures, adapting to specific requirements as needed.

A guide on how to use the Tail
Step 1: Switch the Screen Casting Platform on NearHub Board
To ensure that NearHub Tail can be used smoothly and successfully, you need to make sure that the casting platform on your NearHub Board has been switched to Tail mode before using Tail. Now, let me show you step-by-step how to switch casting platforms.
-
Find [Settings] in the bottom right corner of NearHub Board.
-
Find [NearHub Cast] in the System
-
Click [Screen casting platform] to find [NearHub Tail (alpha)], then check this option to complete the platform switch.

Step 2: Pairing the Tail with NearHub Board
The premise of fast screen projection is that the Tail has been paired with your NearHub Board.
-
To achieve pairing, you need to insert the USB-A connector into the designated port on the screen. When you plug in the screen port, the blue light on it will start blinking. You are supposed to keep it plugged in until the blue light no longer flashes and becomes a long bright state.
-
When the blue light is long on, the tail is successfully paired with the board, and there will be corresponding pop-ups [Tail box connected] on the screen.

For your convenience and to minimize time spent on screencasting, NearHub Tail only needs to be paired with the NearHub Board once. When the first pairing is successful, there will be no need to re-pair during subsequent use.
Step 3: Connect the Tail to the Computer
After pairing, you need to unplug it from the board and connect it to the computer. Once connected to the computer with the appropriate interface, you can quickly achieve the screen projection.
Mac OS
-
If you are a Mac OS user, after finishing pairing the tail with NearHub Board, just connect the type-C port of the tail to your MacBook, and wait for a few seconds to realize wireless screen casting. Then, there will be corresponding pop-ups [Welcome TailClient ] on the screen.
Windows OS
-
If you are a Windows user, please link two cables simultaneously, HDMI and USB-A, to ensure smoothness and stability when using the Tail to cast the screen, considering that the USB-C ports on some Windows computers are only for charging and don't support audio/video data transfer. After successfully casting the screen, there will be corresponding pop-ups [Welcome TailClient ] on the screen.
* It is also feasible for some Windows computers to connect directly with USB-C.
* If the casting fails, please repeat all the steps from pairing the tail with your NearHub Board onwards.

These types of connectors comprehensively address the diverse needs of computer screen projection. Depending on your computer specifications, you have the flexibility to opt for any of these methods that best suit your requirements.
Once the Tail has achieved a successful pairing with the board, you have the convenience of directly connecting it to your computer for screen projection. This simplifies your meeting preparations and enhances the efficiency of your meetings and presentations.
If you encounter any problems in the process or have any further questions, please submit a support ticket here. Our support team will respond as soon as possible.