


This article presents a comprehensive "Ultimate Guide" to Whiteboard Artwork for 2025, addressing its strategic role in enhancing organizational culture and visual communication. It analyzes the technological shift from traditional surfaces to digital smart writing boards, offering a comparative analysis of utility, cost, and creative potential. Furthermore, the text provides technical instruction on artistic methods suitable for dry-erase mediums and establishes best practices for surface maintenance, positioning whiteboard artwork as a critical element of modern office design and employee engagement.
Key Takeaways
- Cultural Impact: Integrating whiteboard artwork into the workspace significantly improves team morale, reduces stress, and enhances visual communication.
- Smart Technology: Digital smart boards like NearHub offer superior artistic tools (infinite canvas, layers, undo functions) compared to traditional analog boards.
- Artistic Techniques: Professional results can be achieved using specific methods like cross-hatching, stippling, and the "negative space" erasure technique.
- Maintenance Essentials: Proper whiteboard cleaning protocols—specifically using isopropyl alcohol and changing erasers frequently—are crucial to prevent ghosting and permanent staining.
- Design Trends: 2025 trends include "framed" gallery-style whiteboards and full-wall collaborative murals to foster employee engagement.
Is there anything more intimidating—or more full of potential—than a blank white surface?
Whether you are walking into a corporate boardroom, a bustling university classroom, or your own dedicated home office, the whiteboard is often the focal point of the room. Yet, so many of us leave it blank, or worse, covered in the ghosted remnants of a "Do Not Erase" meeting note from three months ago.
Welcome to the Ultimate Guide to transforming that blank space. This isn't just a cursory list of doodles; this is a comprehensive deep dive into the world of whiteboard artwork, designed to serve as your go-to pillar page for everything related to dry-erase creativity in 2025.
In this extensive guide, we will move beyond simple stick figures. We will explore how whiteboard artwork boosts team morale, how to leverage advanced smart writing board technology for digital artistry, and the specific techniques required to turn a temporary medium into a lasting impression. We will also cover essential maintenance protocols for cleaning whiteboard surfaces to keep your canvas pristine.
Let’s pick up the marker (or stylus) and turn that white void into a masterpiece.
Why Whiteboard Artwork is Essential for Modern Office Culture
In the fast-paced, hybrid-focused digital era of 2025, the physical workspace is evolving. The sterile, gray cubicle farm is dead. In its place, forward-thinking companies are cultivating environments that foster creativity, psychological safety, and dynamic collaboration. Surprisingly, whiteboard artwork plays a pivotal role in this cultural shift.
The Psychology of Visual Spaces
Visual stimuli are not just decoration; they are cognitive tools. According to the Social Science Research Network, 65% of the population are visual learners. When a team member walks into a room and sees a beautifully drawn quote, a complex mind map, or a humorous cartoon related to the project at hand, it does more than just look good—it disarms stress and stimulates the creative centers of the brain.
- Stress Reduction: Art breaks the visual monotony of data, spreadsheets, and endless text. A well-placed doodle can lower cortisol levels during high-stakes meetings.
- Enhanced Communication: A picture is worth a thousand words. A well-drawn diagram or whiteboard artwork visualization can explain complex workflows instantly, bridging language and department barriers.
- Space Ownership: Allowing employees to contribute to whiteboard artwork gives them a tangible sense of ownership over their physical environment, fostering a deeper connection to the workplace.
Bridging the Hybrid Gap with Digital Art
With the rise of hybrid work models, the definition of a "whiteboard" has changed. Tools like NearHub smart boards allow for digital whiteboard artwork that can be shared instantly with remote colleagues. It’s no longer just about the people in the room; it’s about creating a shared visual culture that spans the globe.
Top 20+ Whiteboard Artwork Ideas to Spark Creativity in 2025
Stuck on what to draw? Whether you consider yourself a professional artist or someone who struggles with basic shapes, these whiteboard artwork concepts are categorized to help you find the perfect design for your space.
1. Seasonal and Holiday Whiteboard Artwork Themes
One of the easiest ways to keep the board fresh and engaging is to follow the calendar. Seasonal art signals that the office is active and present.
- January (New Beginnings): Draw New Year’s resolutions written inside champagne bubbles or exploding fireworks. Use metallic markers if available for extra flair.
- February (Connection): Valentine’s hearts are classic, but try abstract red/pink geometric patterns or "We Love Our Customers" thematic art.
- Spring (Growth): Floral borders are a major trend. Draw vines creeping up the sides of the whiteboard; this looks elegant and leaves the center open for actual meeting notes.
- October (Fun & Spooky): Spooky silhouettes, cobwebs in the corners, and pumpkin patches. This is often the most popular time for whiteboard artwork.
- December (Festive): A giant snow globe where team members can draw themselves inside, or a fireplace scene with stockings for each department.
2. The "Quote of the Week" Typography Art
Typography is a massive trend in whiteboard artwork for 2025. You don't need to draw complex scenes; you just need to write beautifully.
- Block Lettering: Use the broad side of a chisel tip marker to create thick, bold letters. Add drop shadows using a lighter color (like gray or light blue) to make the text pop off the board.
- Faux Calligraphy: Write in cursive first. Then, go back and thicken the "downstrokes" (any line where your pen moved downward). This mimics the look of a professional brush pen.
- Banner Headers: Draw a ribbon, scroll, or banner and write the team's main goal or sprint focus inside it. This frames the text and gives it importance.
3. Gamified Productivity Trackers as Art
Turn your Key Performance Indicators (KPIs) into whiteboard artwork.
- The Thermometer 2.0: Classic, but effective. Dress it up by turning the "mercury" into a rocket ship launching into space as you reach goals.
- The Progress Map: Draw a "Lord of the Rings" style fantasy map where "X" marks the project deadline. Move a magnet ship or character across the dotted line daily.
- RPG Character Sheets: Draw an avatar for the team. As tasks are completed, draw new "armor" or "weapons" on the avatar to symbolize leveling up.
4. Interactive "Add-Your-Own" Doodles
These are designed for engagement and team building.
- The Empty Fishbowl: Draw a large fishbowl and some water. Leave a pile of markers and a note asking the team to "Populate the tank." You will end up with fish, divers, submarines, and monsters.
- The Community Garden: Draw the horizon line and some stems; let the team draw the flowers and bugs.
- Caption This: Draw a funny, ambiguous scene (e.g., a penguin holding a briefcase) and leave space for people to write captions.
Mastering Tools for Stunning Whiteboard Artwork: Markers & Tech
Creating stunning whiteboard artwork requires the right tools. Using a dried-out, faint marker is the quickest way to ruin a design.
The Analog Toolkit: Beyond Black and Blue
To achieve depth, vibrancy, and a professional look, you need more than the standard office pack.
- Neon Markers: Essential for highlighting and creating "glow" effects, especially on black glass boards.
- Chisel Tips: Perfect for calligraphy, filling large areas quickly, and creating varying line widths.
- Fine Points: Crucial for detailing, outlining, and adding texture to your whiteboard artwork.
- Microfiber Cloths & Q-Tips: These are your blenders. Yes, you can shade on a whiteboard! A Q-tip is perfect for erasing tiny details or smoothing out a shadow.
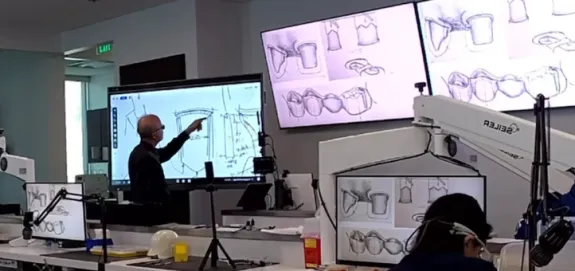
The Digital Advantage: Smart Writing Boards
In 2025, many offices are upgrading to digital solutions to avoid the mess and permanence issues of ink. A smart writing board changes the artistic game entirely.
- Infinite Canvas: You never run out of space. You can scroll the canvas to keep adding to your mural without erasing the previous week's work.
- Undo Button: The artist's best friend. No need to wipe and restart; just tap undo.
- Layers: Just like in professional design software (Photoshop), you can keep your artistic background on one layer and write meeting notes on a top layer. When the meeting is over, hide or erase the notes, and the whiteboard artwork remains untouched.
- Templates: NearHub boards often come with built-in templates (grids, mind maps, perspective lines) that can serve as a base for your designs.
Step-by-Step Tutorial: Creating 3D Whiteboard Artwork
Want to impress the boss or your students? Let's walk through creating a 3D illusion using standard markers. We will draw a simple 3D cube floating in space.
- Draw the Front Face: Use a black marker to draw a perfect square in the center of your space.
- Draw the Back Face: Draw a second identical square, slightly higher and to the right of the first one. It should overlap the first square.
- Connect the Vertices: Draw diagonal lines connecting the top-left corner of the first square to the top-left of the second, and so on for all four corners.
- Erase Hidden Lines: This is crucial for realism. Carefully wipe away the lines of the back square that would be "behind" the front square to create solidity.
- Add Shadow (The Secret Sauce): This is the most important part of whiteboard artwork. Use a blue or purple marker to lightly color the bottom and right sides of the cube (assuming the light is coming from the top left).
- Smudge for Effect: Use your finger or a microfiber cloth to smudge the shadow color slightly outward and fade it into the white. This creates a soft gradient shadow.
- Highlights: Use a clean finger to wipe a sharp line through the shadow or use a white liquid chalk marker to add a "shine" on the top edges.
Pro Tip: Always outline your final shape with a fresh, dark black marker to make it pop against the shading.
Smart Boards vs. Traditional: Elevating Your Whiteboard Artwork
When considering upgrading your office for better visual collaboration, the question often arises: how much is a smart board compared to a high-end glass traditional board?
While a traditional board is a one-time purchase, the recurring cost of markers, cleaners, and the limitation of non-savable content can be significant. Smart boards offer a higher ROI for creative teams who value persistent and shareable whiteboard artwork.
Comparison Table: Art Capabilities & Utility
| Feature | Traditional Whiteboard | Smart Interactive Whiteboard (e.g., NearHub) |
|---|---|---|
| Drawing Tools | Physical markers (limited colors, dry out) | Digital stylus, millions of colors, brush types |
| Correction | Eraser (messy, dust, potential ghosting) | Undo/Redo, selective erase, resize tools |
| Saving Art | Photo required (glare issues, low res) | Instant digital save & export (PDF/PNG/JPG) |
| Collaboration | Local only (must be in the room) | Real-time remote collaboration & annotation |
| Multimedia | None (cannot add images) | Import images/videos directly into the artwork |
| Longevity | Surface degrades/stains over time | Durable glass screens, no staining |
For teams serious about visual communication, the investment in a smart board pays off by integrating whiteboard artwork directly into the digital workflow.
Advanced Whiteboard Artwork Techniques for Professionals
If you have mastered the basics, it's time to elevate your whiteboard artwork to gallery quality. These techniques borrow from classical art training but are adapted for the slick, non-porous surface of a whiteboard.
1. Cross-Hatching for Shading
Since you cannot blend dry-erase ink easily without removing it (unlike pencil or charcoal), cross-hatching is vital for creating value.
- Technique: Draw a series of parallel lines close together to create a darker value.
- Cross-Over: Draw a second set of lines perpendicular to the first set to make it even darker.
- Application: Use this for shadows in portraits, architectural sketches, or adding depth to lettering on the board.
2. Pointillism (Stippling)
This technique is time-consuming but looks incredible and prevents the dreaded marker smear.
- Technique: Create images using thousands of tiny dots instead of lines.
- Density: More dots close together = dark shadow; fewer dots = highlights/light areas.
- Why it works: It saves your marker tip from flattening out and creates a unique texture that stands out in a corporate setting. It allows for subtle gradients that are otherwise impossible with markers.
3. The "Negative Space" Method
Start with a fully colored background and erase to draw.
- Step 1: Color a large patch of the board with a heavy color like blue, black, or green.
- Step 2: Let it dry for 30 seconds to adhere.
- Step 3: Use a fine-tip eraser, a Q-tip, or your finger to "draw" by removing the ink.
- Result: This creates a striking, high-contrast look that resembles a blueprint or a neon sign glowing in the dark. This is a very popular style for whiteboard artwork.
Cleaning Whiteboard Surfaces to Preserve Your Whiteboard Artwork
Nothing ruins whiteboard artwork faster than a dirty, gray canvas. Cleaning whiteboard surfaces properly is essential to prevent "ghosting" (faint marks left behind) and permanent staining.
The Golden Rules of Whiteboard Maintenance
- Wait Before You Wipe: If you erase ink while it is still wet, it smears and stains. Wait at least 10-15 seconds for the solvent to evaporate completely.
- Change Erasers Frequently: A dirty eraser just spreads ink dust around. If your felt eraser is caked in dust, wash it (if reusable) or replace it immediately.
- No Abrasives: Never use scouring pads, steel wool, or harsh scrubbers. They create micro-scratches in the surface where ink will settle and become permanent.
Best DIY Cleaning Solutions
Sometimes the commercial spray runs out. Here is what you can use:
- Isopropyl Alcohol (90%+): The most effective cleaner. It cuts through old wax and grease instantly.
- Glass Cleaner: Good for glass boards, but ensure it is ammonia-free if using on melamine boards to avoid damaging the coating.
- Vinegar and Water: A gentle, eco-friendly option for light cleaning.
How to Save Your Artwork (While Cleaning Around It)
If you have a beautiful piece of whiteboard artwork you want to keep but need to clean the rest of the board:
- The Tape Method: Use painter's tape to create a border around your artwork. Clean the rest of the board vigorously. Peel the tape for a crisp, clean edge that frames your art.
- Digital Capture: If using a NearHub smart board, simply save the file to the cloud. For analog, use a scanning app (like Google Lens or Microsoft Lens) that flattens the image and removes glare before you wipe it away.
Integrating Whiteboard Artwork into 2025 Design Trends
Whiteboard artwork is influencing office interior design trends in 2025. It is no longer just a utility tool; it is a decor element.
The "Framed" Gallery Look
Offices are moving away from the standard aluminum tray.
- Wood Frames: Installing rustic or sleek wood frames around whiteboards to make them look like gallery pieces.
- Artwork Focus: Dedicating one specific whiteboard solely for art, distinct from the brainstorming boards. This signals to the team that creativity is valued just as much as productivity.
Collaborative Murals and Whiteboard Walls
Companies are dedicating entire walls to whiteboard paint (dry-erase paint).
- Concept: A floor-to-ceiling wall where whiteboard drawing ideas can expand beyond the confines of a rectangle.
- Activity: "Friday Murals" where the team spends the last hour of the week adding to a massive, ongoing doodle that represents the week's wins.
Conclusion
Embracing whiteboard artwork in 2025 is about more than just decoration; it is about cultivating a workspace that values expression, clarity, and human connection. Whether you are sketching a quick motivational quote on a Monday morning, creating a complex architectural diagram, or simply doodling to relieve stress, the humble whiteboard is your canvas.
We have explored the psychological benefits, detailed actionable whiteboard drawing ideas, mastered the techniques of shading and perspective, and discussed the critical importance of cleaning whiteboard surfaces to maintain their life. We also looked at how modern technology is revolutionizing this space.
As we move forward, the line between analog and digital continues to blur. Smart technology allows us to take our ephemeral scribbles and turn them into lasting digital assets.
Ready to upgrade your canvas?
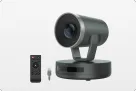
If you are tired of ghosting, stained boards, and limited space, it is time to look at the future of collaboration. Looking for a reliable whiteboard artwork solution? Check out our smart interactive white board here:
NearHub S55 Smart Whiteboard | 4K Interactive Touch Screen with Cam & Mics
Frequently Asked Questions (FAQ) About Whiteboard Artwork
Here are some common questions about creating, maintaining, and optimizing your whiteboard artwork.
What are the best markers for professional whiteboard artwork?
For professional results, look for low-odor dry-erase markers with high pigment density. Brands like Expo are standard, but for art, consider Pilot V Board Master markers (which are refillable and have vibrant ink flow) or liquid chalk markers for glass boards, as they offer much higher opacity and vibrant neon colors that stand out against the background.
How can I prevent my whiteboard art from being accidentally erased?
This is a common pain point! The best method is to place a "DO NOT ERASE" sign clearly near the art. Alternatively, use wet-erase markers (like those used for overhead projectors) for the artwork parts you want to stay permanent-ish; they only come off with water, so a standard dry eraser won't remove them during routine cleaning.
Can I use permanent markers for whiteboard lines and grids?
Technically, yes. You can draw grids with a Sharpie and erase over them with dry-erase markers without removing the grid immediately. However, to remove the permanent marker later, you will need to scribble over it with a dry-erase marker (the solvent dissolves the permanent ink) or use alcohol. It is risky for the board's longevity and not recommended for high-quality boards.
How often should I be cleaning whiteboard surfaces to prevent staining?
For heavy use, clean the board thoroughly with a liquid cleaner at least once a week. For standard use, a deep clean every two weeks is sufficient. Always erase content within 24 hours if possible, as leaving ink for weeks increases the risk of ghosting and makes the eventual cleaning whiteboard process much harder.
Are smart whiteboards better for artwork than traditional ones?
For versatility and preservation, yes. Smart boards like the NearHub allow for layers, unlimited colors, and undo functions, which are impossible on analog boards. They also allow you to import images to trace or collage, making complex whiteboard drawing ideas accessible to non-artists who want to contribute.
What is the best way to photograph whiteboard artwork without glare?
Avoid using the flash. Turn on room lights but try to position yourself so the overhead lights aren't reflecting directly in the center of the image. Take the photo from a slight angle rather than dead-on, or use a document scanning app that automatically corrects perspective and enhances contrast to make the whiteboard artwork look digital.


